Decktamer Beginner's Guide: How to Stop Sucking and Clear Hard Mode
Your first 100 runs are just the tutorial. Let's fix that.
So, you're diving into the abyss. Welcome to Decktamer. The first thing you need to learn is how to lose, because it's going to happen a lot. This is a roguelike, and that means some runs are just cursed from the start.
This game is a monster-catching deck-builder, but it's also got permadeath. When one of your creatures dies, that card is gone forever. Your goal is to get to and clear Hard (Explorer) mode, and to do that, you need to stop thinking like a collector and start thinking like a back-alley surgeon.
The Golden Rule: Your Deck Is Too Fat
Your first instinct is to "catch 'em all." Don't.
This is a deck-builder, and a bloated deck is a dead deck. I keep my party at 5-7 tames, maximum. Why? Less RNG.
A smaller deck means you consistently draw your best creatures. It also lets you cycle your "when placed" skills more often, which is critical for boss fights.
Building a Team That Doesn't Suck
My basic comp for any successful run looks the same: one or two heavy-hitting damage carries, one or two dedicated tanks, some kind of support, and a throwaway "meat shield" for emergencies.
Your support's job is to either keep your team alive or buff your damage carry so its "attacks all enemies" or "attacks X times" moves just wipe the board. By round 8, you'll want two solid tanks and two solid damagers, because your early tames will start to fall off.
For your starter, Kilimaro and Furble are both great. For your "Accompany" (support) card, the Amethyst Ant is top-tier with its high speed and great heals. Early on, Bull Weevil and Bell Rat make fantastic tanks, but just know that they will die. They're temporary.
My "Always-Tame" List
You'll learn to spot the gems. Here are a few creatures that are almost always worth a spot on my team, even if it's just for a little while.
| Creature | My Take |
|---|---|
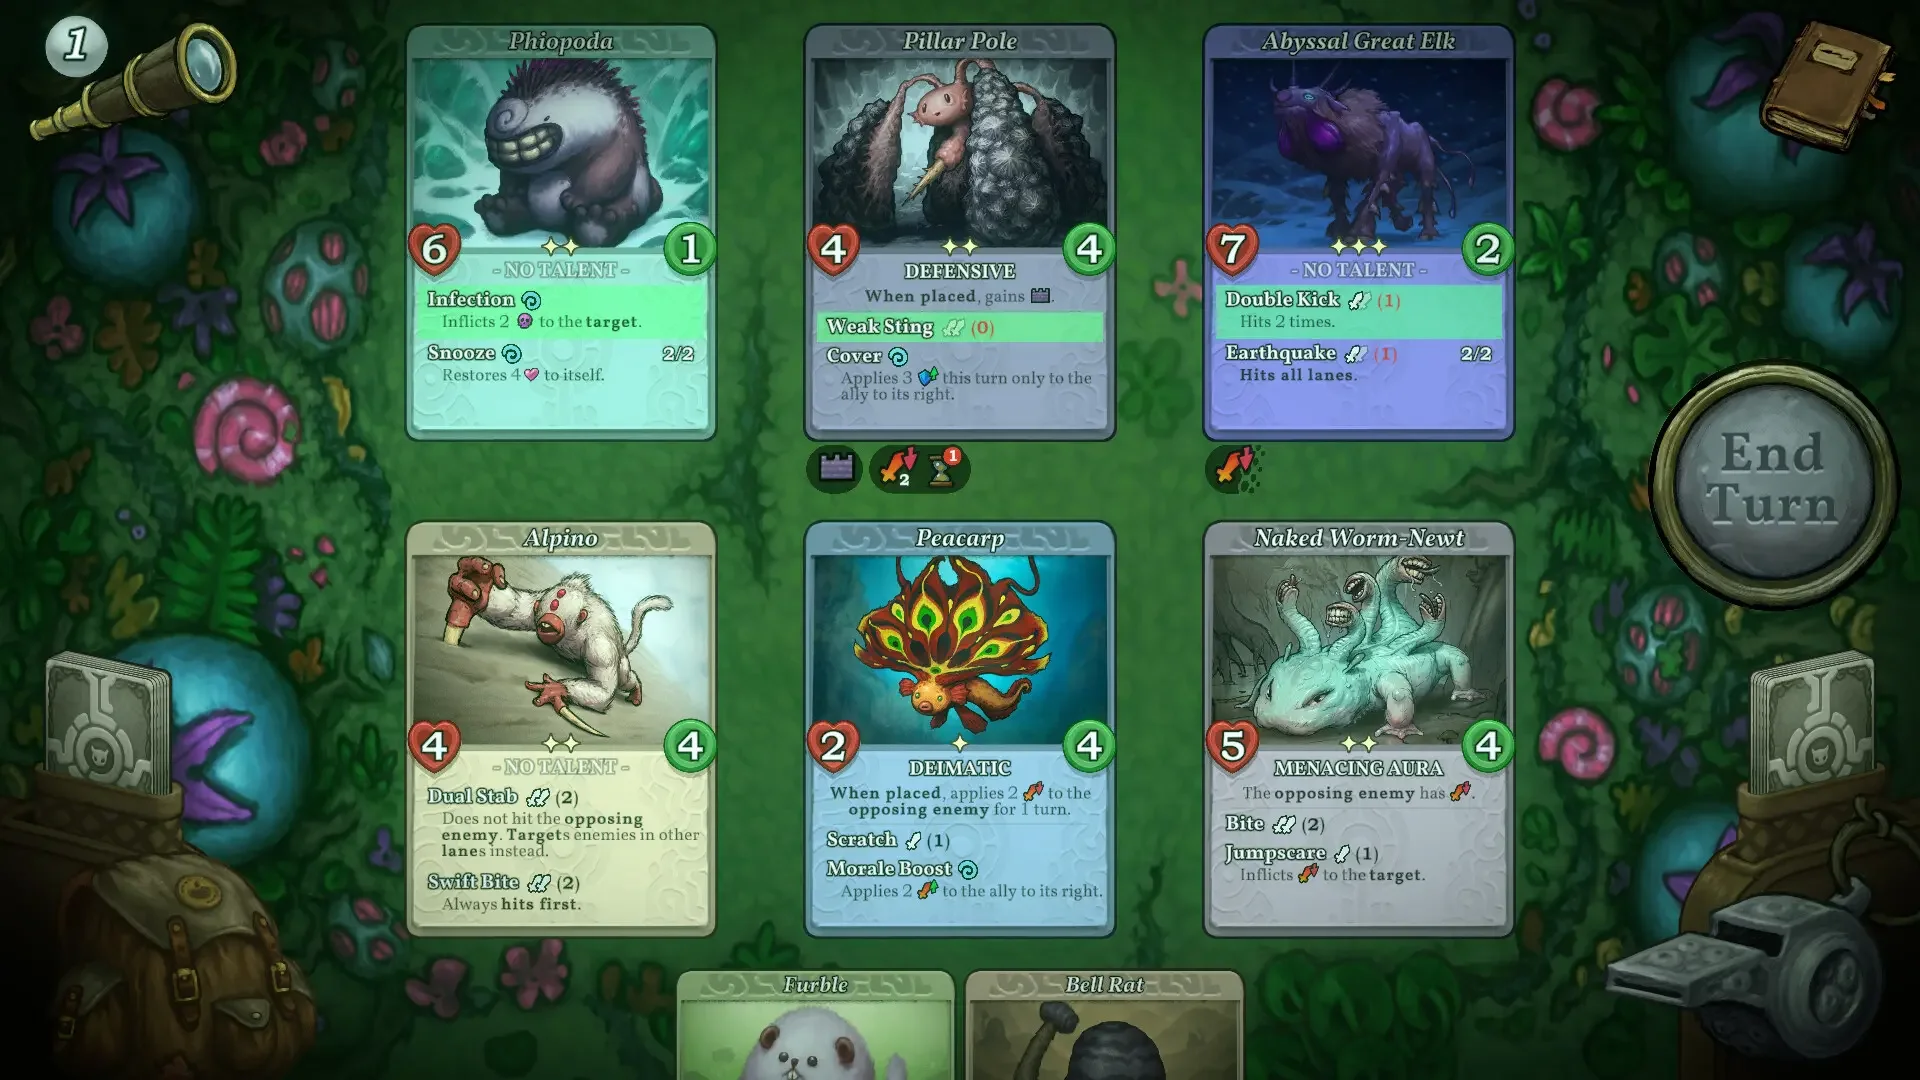
| Pillar Pole (2*) / Hollow Ape (2*) | Cards like this are essential. You need creatures that can either soak a massive hit or heal substantially. |
| Peacarp (1*) | One of the best early-game debuffers. It can honestly stay relevant for an entire run if you protect it. |
| Spinehog (2*) | This thing is a DPS monster. It can roll with "attacks first," "attacks all enemies," AND "attacks twice". If you see one, buff it. |
| Xiphonoir (4*) | My panic button. If you get to round 7 and have no reliable damage, this thing (with the Berserk talent) can save a run. |
The Art of the Syringe: Building a Monster
This is the most important part of the game. Most monsters you tame are garbage... but they might have one amazing talent.
That's what "building" a tame means. You aren't finding your perfect carry; you are making it. See a great skill like "+2 ATK on kill" or "move first for 1 turn when placed" on a useless 1-star hobo? Tame it anyway.
This is where the Extraction Syringe comes in. You use it to suck that one good talent out of the hobo and inject it into your actual carry.
You only get about five syringes a run, so use them wisely. Did you forget a meat shield and your main tank is about to die? Use a syringe to steal its best skills before it bites the dust. Don't risk curses on your essential cards.
A word of warning: the Golden Syringe is a trap. It's a gamble. It's almost always better to spread your good skills across two or three solid creatures than to dump everything into one "masterpiece" that can get one-shot by a bad RNG roll.
A Few Quick Tips to Stop You from Crying
Stop Chasing Synergies. This isn't Slay the Spire. Don't try to build a complex "poison deck" or "sleep deck". It's too fragile. Just build one or two creatures into absolute killing machines. A damage carry with the "Sturdy" talent becomes almost unkillable.
Take the Beetle. When you get a reward, always take the beetle.
Use Your Items. Don't hoard your healing items until everyone is already dead. Use them before the fight goes south.
Don't Heal Fodder. Stop wasting your healing items on your starting "Accompany" cards. They are meant to die. Let them.
Plan Your Fights. Before you jump into a battle, look at the enemy. You might want that OP tame, but is it worth sacrificing half your team's health to get it? Sometimes the answer is no.
You might also like
Touhou Dystopian: A Beginner’s Guide to Not Dying Horribly (Maybe)
ARC Raiders FAQ: Your Guide to Surviving Killer Robots and Greedy Bastards
Sunken Engine Review: Fixing Boats and Fighting Eldritch Bullshit