NORSE: Oath of Blood Beginner's Guide - Surviving The Slaughter
This brutal tactical RPG will happily grind your warband into the mud if you march into battle without a solid plan, so I put together the exact strategies you need to survive.
I have watched enough of my own warriors bleed out in the dirt to know that NORSE: Oath of Blood does not hold your hand. Arctic Hazard built a tactical experience that blends unforgiving turn-based combat with a survival system that constantly threatens to ruin your day. If you make a stupid mistake, your units die permanently. If you fail to manage your settlement, your people starve and their morale plummets. I spent hours grinding through the map, figuring out the brutal mechanics so you do not have to learn them the hard way. Here is everything you need to know to keep your warband breathing.
Mastering The Bloodbath
Combat in this game revolves entirely around positioning, stamina control, and action economy. Getting surrounded is an absolute death sentence. Isolated warriors rarely survive more than a single turn against a competent group of enemies. Moving as a cohesive unit and maintaining a clear frontline keeps incoming damage focused and manageable.
You need to pair your defensive units to hold the front while your damage dealers stay strictly protected behind them. Chasing a single enemy across open ground usually leads to maximum exposure and a dead character.
Stamina And Willpower
Stamina is the absolute backbone of combat. Winning fights is rarely about raw damage output. It is mostly about controlling space and managing your internal resources. Swinging a weapon, sprinting, dodging, and blocking all consume stamina. If you run a unit completely dry to land one extra hit, they are left wide open and the enemy is going to calmly walk up and remove their head. Always leave a small reserve for defensive actions.
You also need to monitor your Willpower. When a unit loses their mental resilience, they panic, disobey your commands, and completely break your formation. Shield walls collapse fast when morale drops.
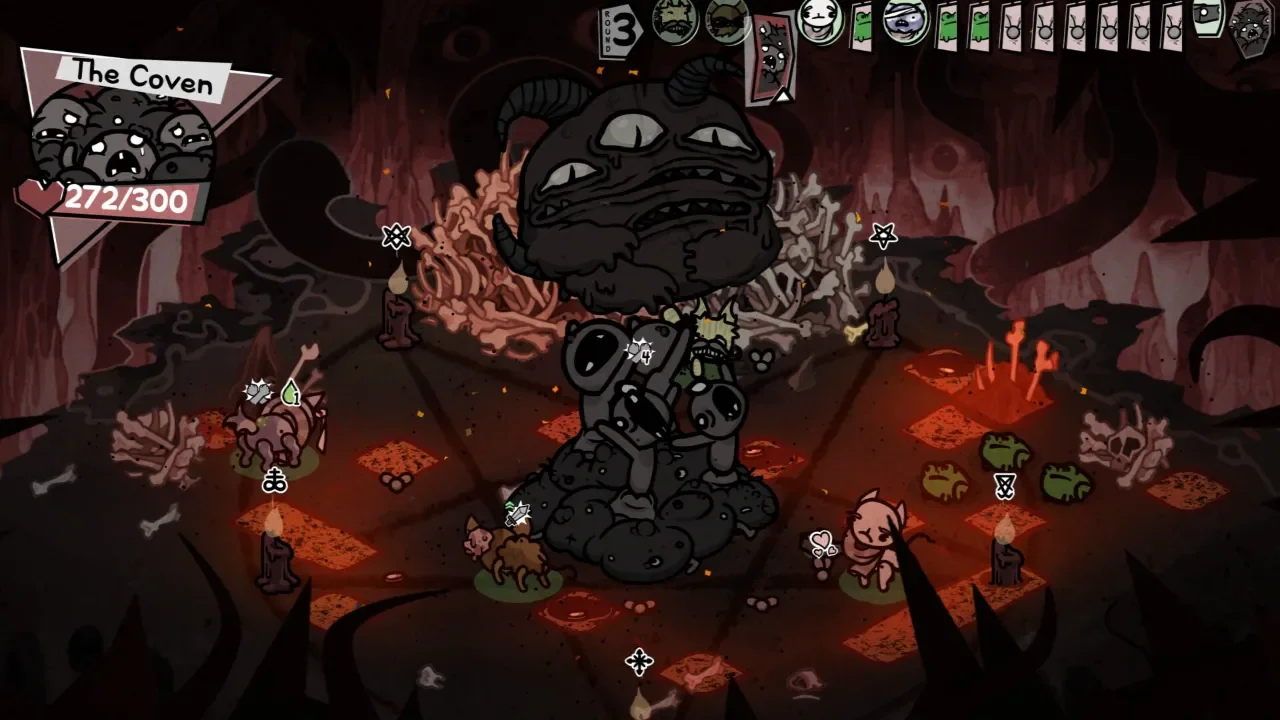
Boss Fights And The Tutorial Trap
A quick tip for the very first tutorial battle. When you use all your attack points with your first character, manually switch to the second character to keep fighting. The game is terrible at explaining this and you will sit there confused.
As for actual boss encounters, they are designed to test your patience. Most bosses follow strict patterns. They telegraph their heavy attacks and aggressively punish poor stamina control. Do not rush your damage. Spend the first few turns observing their behavior and figuring out their rhythm.
Surviving Permadeath And Injuries
This game features permanent consequences, and you need to respect them unless you enjoy starting over from scratch.
Protecting Gunnar At All Costs
Gunnar is your VIP. If Gunnar dies, your run ends immediately. Game over. He should never be the first man charging into a group of enemies. Keep him protected behind your shield wall at all costs.
Knowing When To Retreat
Your non-hero units can and will die for good. Losing a veteran Drengr or Hersir early in the campaign is a massive setback to both your combat effectiveness and your settlement growth. Play conservatively until your warband is fully established. Even if they survive, warriors who finish a battle in a downed state suffer lasting injuries. These range from minor scratches to permanent physical disfigurements that take several turns to recover from back at the settlement. Short term losses always beat permanent unit death. Run away if you have to.
Rebuilding Sudrvik Without Starving
Every single turn in the game consists of brief story updates, a chance to upgrade your team, and managing your construction tasks before picking a mission on the overworld map.
The Smithy And Healing Hut
Your top priority in Sudrvik is building the Smithy. Upgrading your weapons to the iron tier drastically reduces how many turns your battles drag on. The Smithy easily beats the Mead Hall for early investment. Right after that, construct the Healing Hut. Buildings take a set number of turns to finish, and getting the Healing Hut operational early speeds up your warband's recovery between bloody missions.
Managing Morale And Villagers
You need to keep a very close eye on morale. If a raid goes poorly, your villagers will start griping about overwork or mourning the fallen. This directly tanks your resource yields. Assign your villagers carefully between farming, crafting, and defense roles so your resources do not bottleneck your building queues.
Recruiting Dock NPCs
You will slowly bring in traders, blacksmiths, and roaming merchants to your town. Completing story objectives and building adequate housing unlocks these crucial NPCs. While you are waiting for them to arrive, keep your eyes peeled for healing plants around forests and riverbanks on the outskirts of Sudrvik. Harvest them aggressively before you tackle tough fights.
Exploration And Reputation Grind
Progression relies heavily on materials gathered from dangerous areas and your standing with the local factions.
Hoarding Crafting Materials
High tier crafting materials like rare metals are locked behind the tougher regions of the map. This forces a gradual progression instead of letting you rush the endgame builds. Do not waste your rare materials early on garbage upgrades. Invest in reliable mid-tier gear first, then transition once your income stabilizes.
Exploring Side Encounters
Your reputation with different clans unlocks stronger equipment and better rewards. Completing contracts and side objectives increases this standing over time. Ignoring your reputation will absolutely brick your progression later in the campaign. Side encounters during exploration also give bonus experience and rare items, so explore the map thoroughly before beelining to the main objectives.
Fixing The Unreal Engine 5 Performance
The game runs on Unreal Engine 5, and it is incredibly demanding on PC right now. If your rig is crying for mercy, you need to tweak the settings immediately.
PC Settings To Tweak
Lower your Shadow Quality and Global Illumination first. These two settings provide the biggest frame rate gains. Turn off all unnecessary post-processing effects. If you have an Nvidia or AMD card, enable DLSS or FSR to get a solid performance boost with minimal visual loss. I highly recommend capping your FPS to 60 if you are experiencing annoying stutters during the cinematic moments.
The Steam Deck Nightmare
If you are trying to play this on the Steam Deck, put the handheld away. The massive VRAM usage makes it effectively unplayable right now, and I do not recommend trying it until the developers patch the optimization. As for controls, the developers claim controllers are not officially supported yet. An Xbox controller generally works for basic tasks, but mouse and keyboard is the intended and significantly smoother experience.