Scott Pilgrim EX Guide: How To Break The Economy And Fix The Jank
Learning how to actually play this game requires unlearning a decade of standard beat 'em up logic.
I love a good brawler, but Scott Pilgrim EX actively tries to test my patience right out of the gate. The developers handed us a massive roster of seven playable characters, sprinkled in some genuinely fantastic combat mechanics, and then seemingly forgot to explain how any of it actually works. Worse yet, they tied your stats to an unforgiving economy where every single character has their own isolated wallet. If you do not know exactly what you are doing, you are going to spend hours grinding for pocket change while getting absolutely destroyed by basic enemies.
I spent entirely too much time routing the optimal paths, testing the supposedly broken mechanics, and figuring out who is actually worth playing. Here is everything you need to know to survive Toronto without pulling your hair out.
Fixing The Broken Tutorials And Mechanics
Before we even talk about characters or money, I need to address the glaring issues with the game's internal logic. The training mode is notoriously terrible and flat out lies to you about certain inputs.
If you are trying to execute a back attack and your character just awkwardly turns around and punches the air, your controller is not broken. The tutorial conveniently omitted a crucial detail. You have to input the direction and attack button strictly while you are mid combo. If you try to do it from a neutral standing position, the game will ignore the command completely. Honestly, the timing is strict enough that it becomes incredibly annoying during massive brawls. Do yourself a favor, open the options menu, and turn on "auto back attacks" so you can trigger the move naturally without giving yourself arthritis.
Then there is the bomb issue. I spent twenty minutes staring at a cracked wall, dropping a bomb on the floor, and wondering why nothing was happening. Placing the bomb does absolutely nothing. You have to physically hit the explosive with an attack after setting it down to light the fuse. It will start flashing red, giving you exactly enough time to run away before it detonates. It is a completely counterintuitive design choice that the game never bothers to clarify.
The Roster Reality And Swapping Nightmare
You do not have to unlock anyone in this game. All seven characters are available the second you hit start. The major catch is that swapping them out is absurdly tedious. You cannot just change characters from a pause screen. You have to physically walk all the way back to Scott and Ramona's house in the Suburbs area. You can use Subspace Highways to get there faster, but it is always an annoying detour.
Because your money, stats, and equipped badges do not transfer between fighters, swapping from a fully upgraded character to a fresh one is a jarring experience. If you are going to commit to the grind, you need to know who is actually viable.
In my experience playing through the campaign, Gideon Graves is arguably the strongest fighter on the roster. He is an absolute monster with an up heavy that turns him into an unmovable giant. He also possesses a down heavy spinning slash that actually works as a counter, which is an incredibly rare and valuable tool in this game.
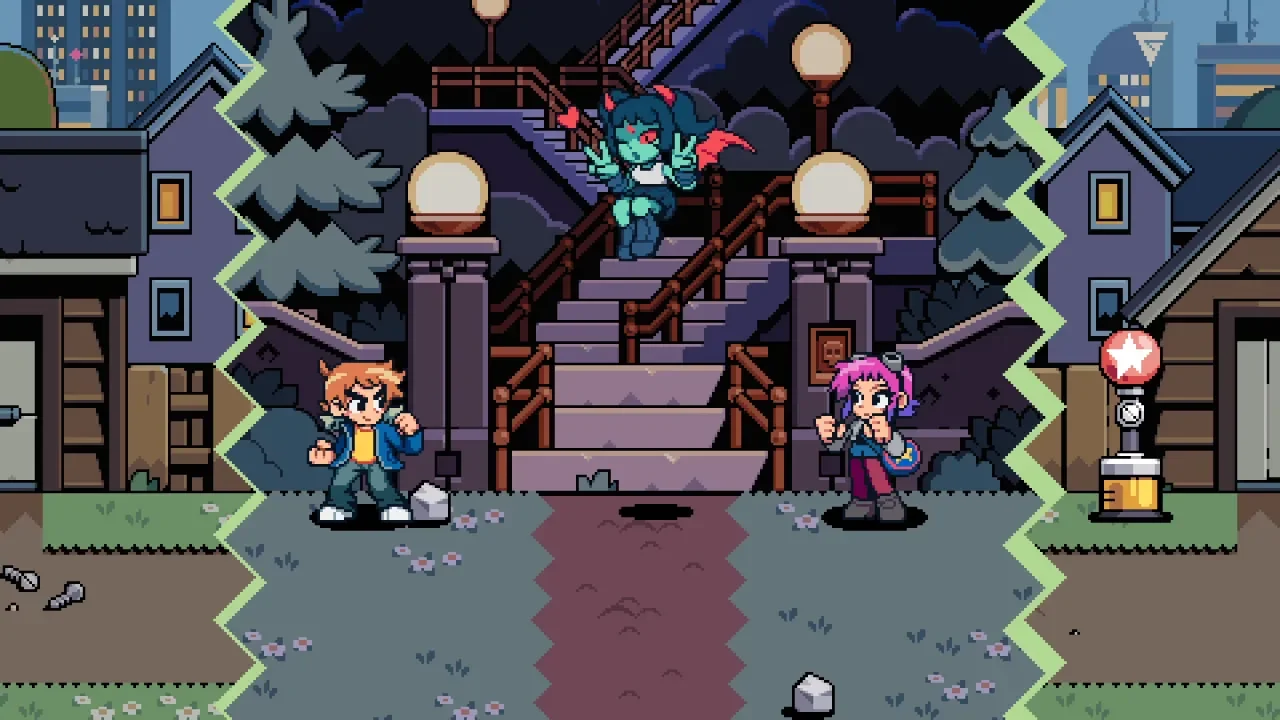
Robot-01 was the biggest surprise for me. This walking tin can is a crowd control machine. His entire kit is built around area denial, featuring an up heavy grenade that instantly dizzies enemies. The grenade arc takes a minute to learn, but once you master it, you control the entire screen. Matthew Patel is another heavy hitter, primarily because his special actually heals him while dealing damage. Combine that with his ability to summon demon hipster chicks and a barrage of tridents, and he becomes a completely self sustaining damage engine.
Scott Pilgrim is exactly what you expect. He is your trusty vanilla baseline. His Power of Love sword attack and signature headbutt are completely reliable, making him a fantastic starting point while you learn the ropes. Lucas Lee, on the other hand, is pure tank material. He hits like a freight train using his skateboard, but he is painfully slow. His charged heavy grab whiffs constantly, making him a frustrating pick if you prefer an aggressive playstyle.
Then you have Roxie Richter and Ramona Flowers, who unfortunately feel like the weakest links. Roxie looks great on paper, but her up heavy is a teleporting smoke bomb that almost never connects with anything useful. Ramona is even rougher. Her heavy attacks rely on pulling random items from her bag or bouncing on her hammer, both of which are highly situational and usually just leave her wide open to getting punched in the face.
Surviving The Toronto Economy
Because every character needs their own cash to buy food and stat upgrades, grinding is a mandatory chore. You need to optimize your income immediately or you will hit a massive difficulty wall.
Before you start farming, progress to Chapter 2 and unlock the Shopping Area. Enter Honest Ex's shop and buy the necessary farming badges. You can only equip two badges at a time, so make sure you unequip them before swapping characters, or they will vanish into the void of your inactive roster.
The Honest Farm
With your badges equipped, head to the Movie Studio. This zone unlocks immediately after Chapter 1. The exterior area with the parking turnstiles and the backstage dressing room consistently spawn massive clusters of enemies. The beautiful part about this specific location is that the enemy types scale dynamically with your main story progress. The coin drops remain relevant no matter how far into the game you are. Just run a loop, clear the crowds, collect your cash, and repeat.
The Infinite Dice Exploit
If you want something faster and far less repetitive, go to the film set inside the Movie Studio and smash the wooden table on the far left to reveal a Golden Key. Take this key back to the Shopping Area and use it on the locked door next to the High Park entrance. This unlocks the Seventh Eleven.
Inside, toss a $1 coin at the Gobliin NPC to start the "Roll the Die" minigame. The goal is to throw dice until your score hits 50. The catch is that any dice hitting the spawning hipster chicks will subtract from your total. The absolute best trick here is to call in Young Neil as an Assist move. He instantly wipes the screen, leaving you free to roll the dice in complete peace. You get a massive chest of coins for winning, plus whatever the hipster chicks dropped. You can easily clear over $100 in minutes, and you can replay it endlessly.
The 96 Guys Gauntlet
Once you reach Chapter 5, go to the No-Account Video store in the Shopping Area to enter the School. Clear the ground floor, head upstairs, clear it again, and break the trash can near the stairs to grab another Golden Key. Take it back downstairs and unlock the central door to access the Dojo.
Speak to Simon Lee to start the "Hell of Fighting 96 Guys" challenge. You have to survive 96 weak vegan enemies in a single unbroken wave. Use Young Neil to manage the massive crowd, spam your area of effect specials, and run around collecting the absurd amount of loot that drops. You can only complete this quest once per character, but the payout is high enough to completely max out your stats in a single run.
Finding The Hidden Palettes
If you want your character to look somewhat respectable while beating up hipsters, you are going to need to buy the alternate color palettes. Every fighter starts with four basic colors, but you can buy two premium outfits per character across two completely hidden shops.
The Make-Up Room is located in the Movie Studio, tucked away just offscreen above the main path. The second shop, Cold Topic, is located in the Gothic Dimension directly above Annex Alley, which you unlock during the third main quest.
Both shops sell individual character palettes for $9.95 and bundle packs for $19.95. If you only buy one cosmetic in the entire game, save your money for the Negative Heroes bundle at Cold Topic. It unlocks Nega Scott and Nega Ramona, which are unquestionably the best designs in the game. Just remember that once you buy them, you still have to walk all the way back to the Suburbs house to actually put them on.