TBH: Task Bar Hero Beginners Guide: How to Survive the First Few Hours
Taskbar Hero runs quietly at the bottom of your screen, but ignoring it completely during your first few hours is the fastest way to ruin your progression.
You might underestimate this title initially. You pick a hero, they move around attacking monsters, and you return to your daily tasks. Under the surface, a deep progression system and a strict economy exist. If you spend your gold on the wrong upgrades early on, your account will stall. I spent my first few days mapping out the menus and systems so you can avoid those early pitfalls. Here is exactly how to set up your account for success.
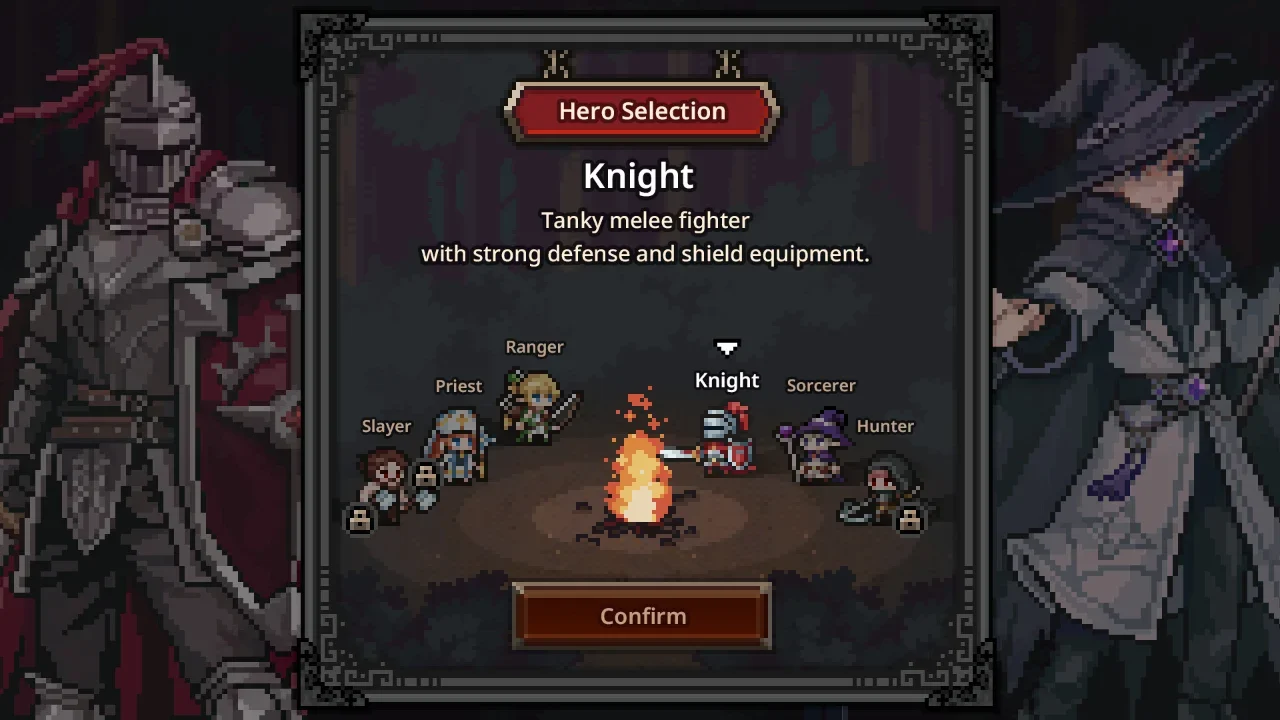
Initial Setup and Class Selection
You start the game with a choice between three free classes. You get the Knight, the Ranger, and the Sorcerer. I highly recommend starting with either the Knight or the Ranger. The Knight is incredibly forgiving because he absorbs a large amount of damage, keeping your run alive. The Ranger attacks fast and clears early stages in record time.
Claim the Priest Immediately
Your actual first move before you even leave the menu is to open the store page and claim the free Priest DLC. You want the Priest in your party immediately. She is the most valuable class in the entire game. Despite being a healer, she runs straight into close combat, so you will eventually need to gear her up with health regeneration and armor. She provides massive buffs that carry your damage output later on.
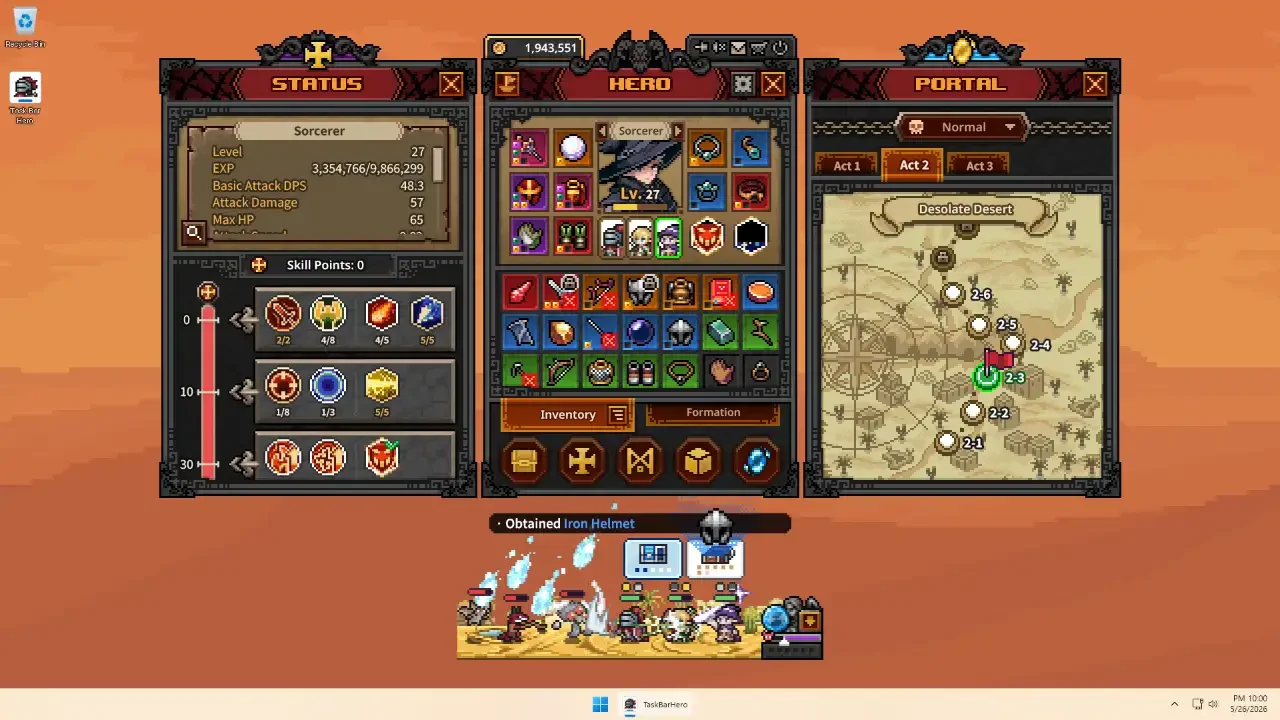
Party Expansion and The Rune Tree
Your absolute biggest priority in the early game is expanding your party. You start with a single hero slot in your Formation screen. Running one hero is inefficient. You need a full team to multiply your damage, your loot drops, and your experience points.
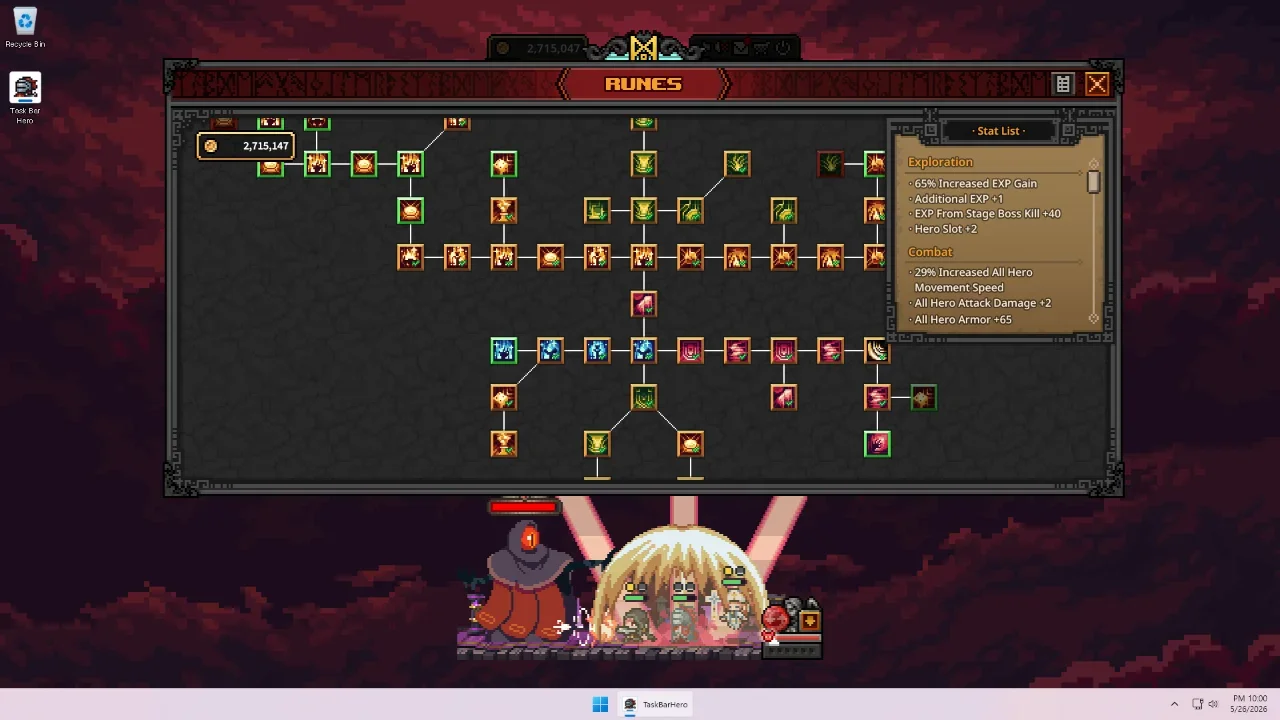
The 150,000 Gold Requirement
You unlock party slots in the Rune tree, which is your permanent upgrade menu located down the south path. The second slot is cheap and easy to grab. Put your Priest in there right away. The third slot costs 150,000 gold. When you are scraping together copper in Act 1, that sounds like an impossible fortune. Save for it anyway. Do not spend your gold synthesizing low-level gear in the Cube. Sell your unwanted items through the Alchemy tab and stockpile your cash until you unlock that third slot. Once you have a full trio, the entire game opens up.
Optimal Early Team Composition
If you are wondering who to put in that formation, I strongly suggest running a specific setup to carry you through the early and mid-game hurdles. I use this exact trio to maximize survival and damage.
The Offline Farming Trap
Since this is an idle game, your first instinct will be to close it overnight and wake up to a mountain of loot. Do not do that.
Why Active Play Matters
When you play offline, your characters do accumulate gold and experience. However, the game drops exactly zero chests while offline. Chests are your primary source of gear and materials. If you rely on offline progression, your heroes will gain levels but their equipment will fall drastically behind, leaving you too weak to clear the acts you are supposedly leveled for. You are far better off leaving the game running in the background while you use your computer. Even 20 minutes of active play where you can actually click on chests is worth more than hours of offline time. Eventually, you can buy Runes that auto-open common and boss chests, which makes keeping the game open while you work incredibly lucrative.
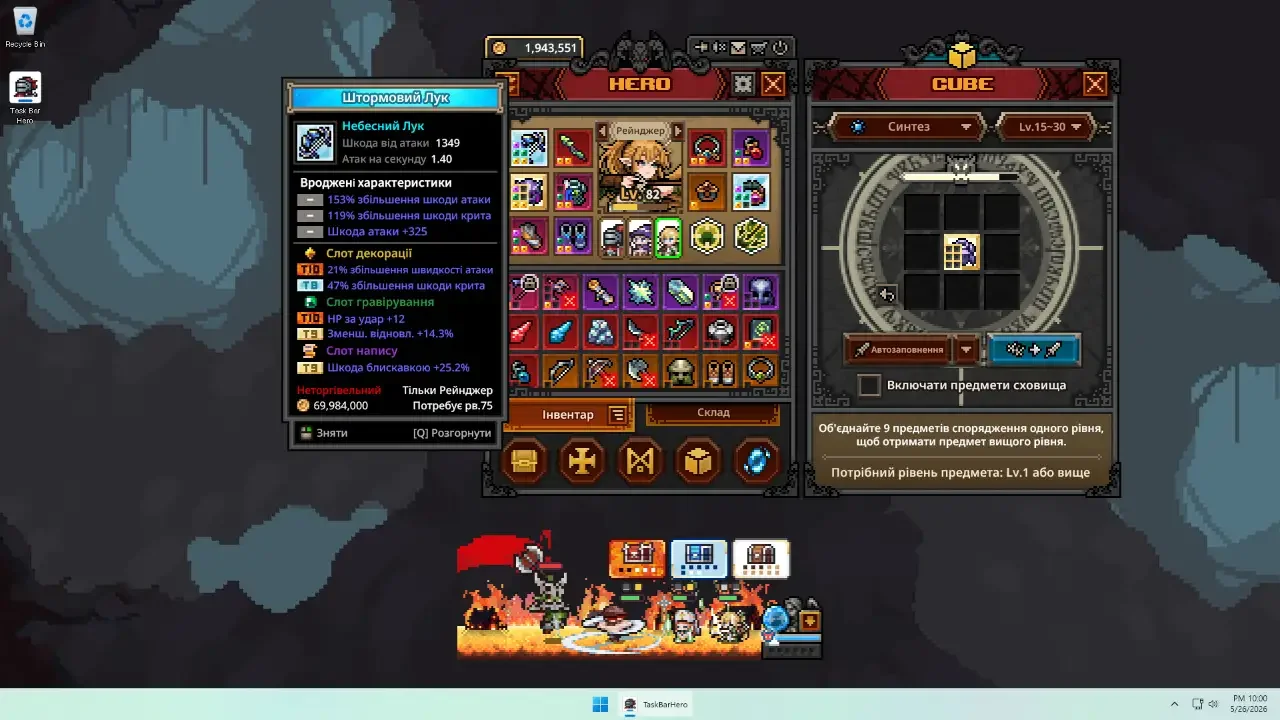
Understanding The Cube and Inventory
The Cube is where most of your item progression happens. It looks complicated, but it handles all your gear upgrades and sales.
Synthesis and Alchemy
Synthesis lets you combine nine items of the same rarity to create one item of a higher rarity. This is your main path to better gear once drops start flowing. Do not rush this in the very early game because you need gold first. Alchemy converts unwanted items into gold. This becomes one of your biggest income sources. Use the Alt and Left Click combination to lock items you want to keep before using the auto-fill feature, otherwise it grabs things you intended to save.
Stash Management and Pets
Each class can only equip certain item types, so check the requirements before assuming something is an upgrade. The Stash is your long-term storage. Good candidates for keeping there include decoration materials, crafting materials, Soul Stones, and high-level gear you cannot equip yet. You can also equip pets in the Formation screen. Their passive effects apply whether they are deployed or not, so equip them immediately for the bonuses.
Progression and Boss Fights
You will inevitably hit a progression wall. You will reach a boss that completely flattens your party.
Soul Stones and Auto-Retry
To reach the boss at the end of each act, you need a Soul Stone for that act. Do not worry about wasting them. A Soul Stone is only consumed when you actually defeat the boss and clear the act. Failed attempts cost nothing. If a boss stops you cold, use the blue portal icon in the bottom right to travel back to an earlier stage. Farm some gear, gain a few levels, and return when you are stronger. You also need to dig into your settings and turn on the auto-retry feature. If your party fails a stage, the game keeps trying without you having to manually reset it. Finally, keep an eye on your character portraits in the formation menu. If you see a red dot, you have unspent skill points. Every point matters, so open up their status windows and assign them.