Vampire Crawlers Guide: How to Unlock Every Village Building
Before you waste three hours banging your head against a difficult boss, you need to upgrade your Village hub to actually stand a chance.
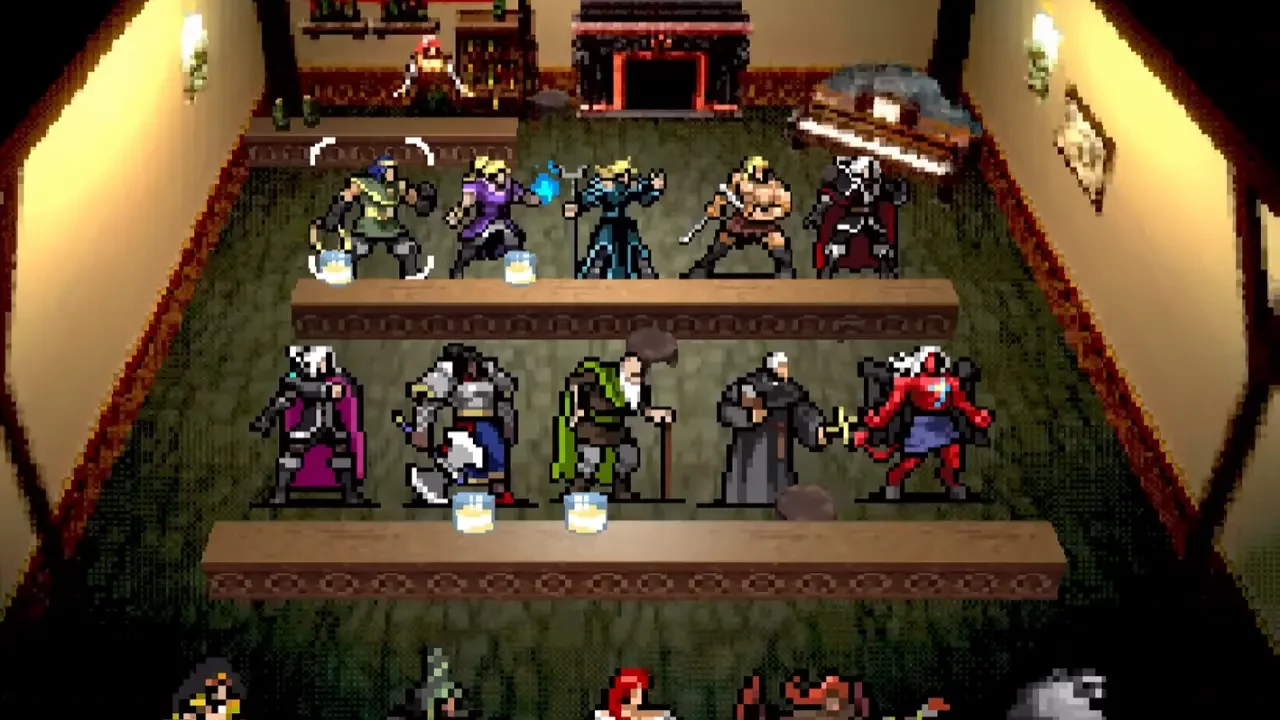
I learned the hard way that jumping straight back into the fray without tweaking your deck will send you back to the lobby in minutes. The Village in Vampire Crawlers: The Turbo Wildcard from Vampire Survivors acts as your central command. It gives you the power to equip arcanas, open up gem slots, and review your relic collection. When you finish a dungeon run, you end up right back here. More structures mean more options to manipulate your deck and increase your survivability. Before I outline the exact requirements for every structure, I highly recommend you secure your progress across all platforms by setting up a save transfer from Game Pass to Steam. Losing your hub progress is a nightmare you want to avoid.
The Core Village Foundations
The moment you finish the mandatory tutorial, you will notice a few structures are already waiting for you in the hub.
Default Unlocks
The Town Hall, the Inn, and the World Map are available right out of the gate. The Settings menu, labeled as the Graveyard, is also there from the start. To populate the rest of the hub, you need to prioritize collecting gold and playing through different dungeons. You do not even need to succeed in these early runs. Simply jumping into the Mad Forest and the Inlaid Library will advance your unlock conditions for certain buildings. If you want to grab every completion mark, ticking off these early upgrades is a massive step for your achievement and trophy guide checklist.
Funding Your Upgrades
Getting your economy running is the first major hurdle you need to clear to expand your operational base.
The Shop
This building lets you spend your hard earned gold on permanent power ups. Boosting your stats like Might, Greed, and Recovery will give you the edge you need to survive longer. To get the Shop to open its doors, you have to collect 250 coins. I highly advise using the cash out option when you pop open a treasure chest. Doing this gives you 200 coins instantly, vastly speeding up the time it takes to reach that threshold.
Hunting For Relics
The remaining buildings demand that you find specific relics scattered across the map to unlock their true potential.
Museum and Fortune Teller
Relics generally make your run harder, but unlocking the structures they provide is absolutely mandatory. The Museum will appear after you play two dungeons, giving you a place to deactivate those punishing relics if the difficulty gets out of hand. The Fortune Teller building allows you to equip your Arcana cards, but you must survive the Furious Forest to track down the Polentir relic first.
The Blacksmith and Jeweller
For the Blacksmith, which lets you modify cards and gems, you must search the Teeny Bridge. This specific dungeon is a small connector path between the forest and library areas leading into the Dairy Plant. Track down the Stardust Anvil hidden there to construct the Blacksmith.
Once you start digging deeper into the mechanics, you will find vital expansions. I consider the Jeweller expansion a critical feature. While it technically attaches directly to the Blacksmith, the control it provides over your build is massive. To unlock it, I recommend surviving the Gallo Tower until you locate the Lapidary Loupe relic. The Jeweller allows you to adjust the rarity levels of your gems. You can actively boost your favorite damage modifiers while sealing away the stats you do not want clogging up your deck.
Village Building Unlock Requirements
I put together the data below so you know exactly what is required to get your hub fully operational. Review the conditions and plan your dungeon runs accordingly.