Arc Raiders Classified Records Keycard Guide: Port Authority Loot
Holding a high value key in your inventory is essentially just painting a massive target on your own back.
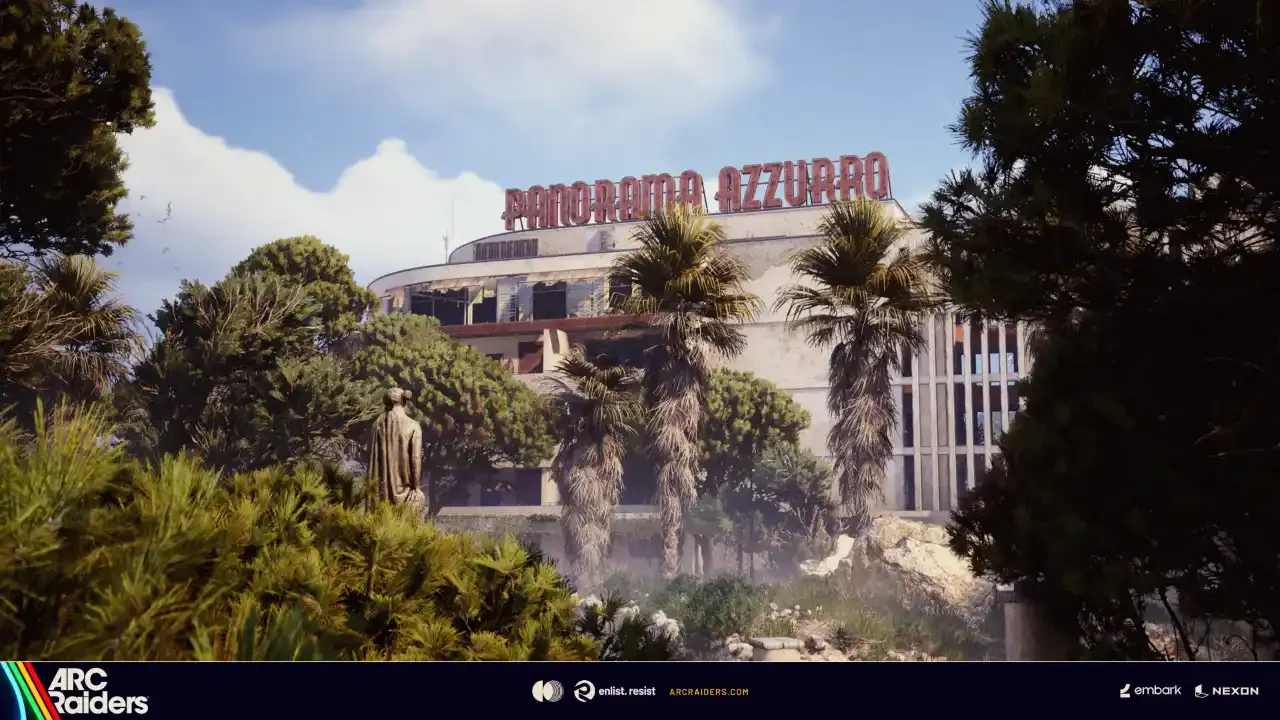
The Riven Tides update introduced a massive new coastal playground for us to get shot in. A new map naturally means a fresh batch of locked doors and the corresponding scramble to figure out which key goes where. If you managed to loot a Classified Records Keycard, consider yourself lucky. The loot inside is entirely worth the trip, but you have to walk into one of the more dangerous buildings on the map to claim it.
If you are already running around the northern edge of the map digging up sand during the Beachcombing map condition, you are actually in the perfect neighborhood to clear this room. Here is the safest route to the loot and the fastest way back to the lobby.
Infiltrating the Port Authority Building
The locked room is located inside the Port Authority Building, which sits on the northern side of Riven Tides. It is a massive structure with only two main entry points, making it an absolute nightmare if another squad decides to camp the exits.
Choosing Your Entry Route
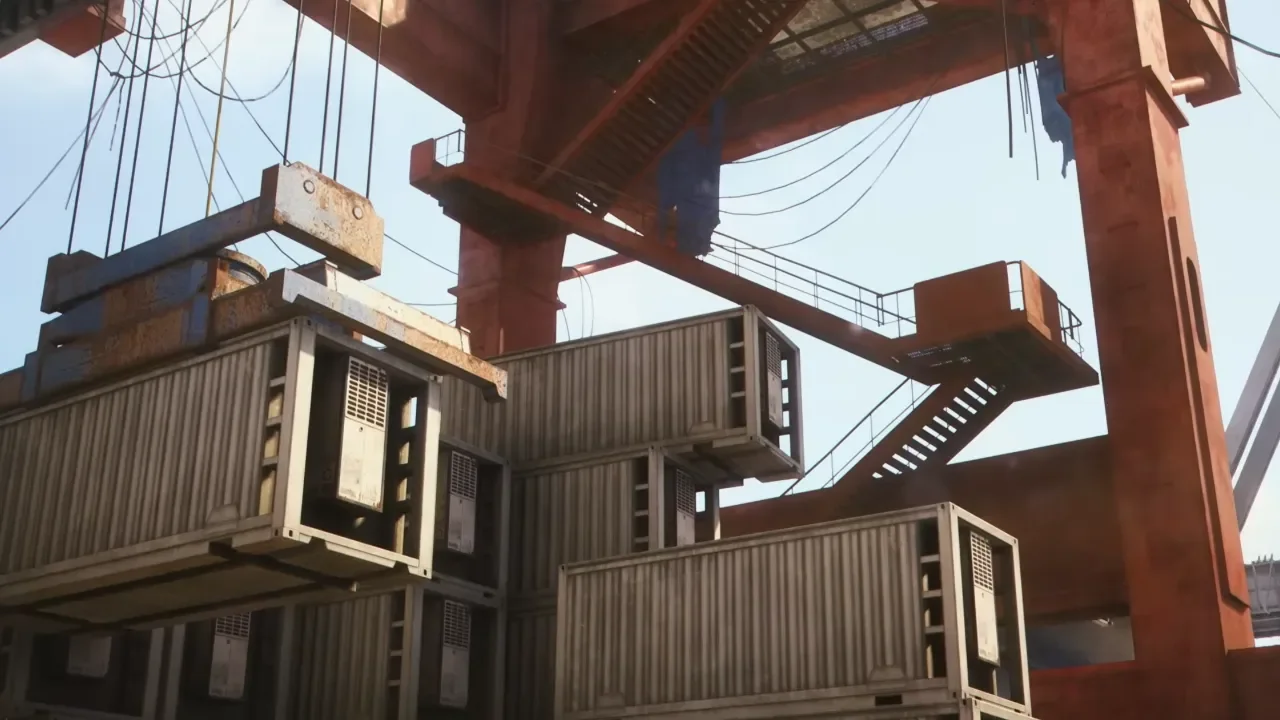
You have a choice to make when approaching the building. If you push in from the Wavebreaker dam side, you can maintain the high ground. This is my preferred method. You can walk along the upper levels or simply head straight up to the roof. Once on the roof, you can drop down through the windows to get inside. It offers a lot of visual cover and keeps you off the obvious ground paths.
If you are approaching from the opposite direction, your options are much more limited. You are forced to climb a fairly exposed ladder to get inside. I usually avoid this unless I am absolutely certain the immediate area is clear. Getting caught on a ladder animation by a passing patrol is a truly miserable way to lose a good key.
Locating the Classified Records Door
Once you are inside the main floor of the Port Authority, you need to understand the layout. The building is shaped like a giant U.
Dealing with the Turret
No matter which entrance you took, you will end up on one of the outer arms of that U shape. You need to push your way to the very bottom center of the structure. The locked room is situated perfectly in the middle between both sides of the building.
Before you sprint to the door, check your corners. There is an automated turret that has a high chance of spawning right near the entrance to this room. Taking it out is not particularly difficult, but it forces you to make noise. Gunfire inside an enclosed space like the Port Authority echoes, and any players farming nearby for the Miniature Voyages event will likely come looking for an easy kill. Clear the turret quickly and keep your head on a swivel.
Looting the Adjacent Rooms
When you actually reach the Classified Records room, you will notice there are two separate doors you can unlock. There is one right in the center and another situated to the right. It genuinely does not matter which one you interact with first. The key works on both and grants access to the same interior space.
Before you unlock it, take a quick look at the room sitting just to the left of the main door. This side room is completely unlocked and usually spawns several lockers and loose containers. Even if a teammate is opening the main vault, you can easily top off your backpack with scrap by sweeping this adjacent area.
After you crack the Classified Records room and secure your loot, do not linger. The Port Authority is a natural choke point, and overstaying your welcome usually leads to a swift trip back to the respawn screen. Fortunately, you have two highly reliable extraction points nearby. Both the Raider Hatch and the Seaside Elevator are a short sprint from the building.