Blossom The Seed Of Life: 8 Things I Wish I Knew Before Booting Up
The promise of quietly terraforming a dead planet as a lonely little robot sounds incredibly relaxing until you realize the game expects you to figure out complex logistics with absolutely zero handholding.
I genuinely respect the developer for stripping away the endless tutorial popups that plague modern survival games. Blossom relies heavily on your intuition. You are dropped onto a barren rock and told to figure it out. That design philosophy is incredibly rewarding when a massive terraforming project finally clicks together. It is significantly less rewarding when you spend forty five minutes screaming at your monitor because your rover refuses to pull a wagon full of silver.
I have spent the last few days grinding through the tech tree, building massive modular convoys, and making every frustrating mistake possible so you do not have to. The early game friction is real. The mechanics are deep, but they are completely undocumented. If you are tired of wandering around the dusty red wastes wondering why your power grid randomly shut down, here is my personal survival manual.
The Printer Is Not Bolted to the Floor
This is the single biggest mental trap new players fall into. When you drop your first printer, it feels like you are establishing your permanent forever home. You start building your storage shelves around it, you set up your power grids, and suddenly you feel tethered to that specific crater.
You are not tied to that spot. Before you unlock the mid game tech that allows you to craft multiple printers, you can literally just pick your original printer up and put it in your pocket. The entire premise of this game is built around mobility. You are supposed to construct modular rover convoys and drag your industrial footprint across the planet. Do not paralyze your progression by treating your first landing zone like a permanent fortress. Pack up your gear and chase the resources.
How to Actually Pull a Wagon and Mine Silver
You can manually mine basic iron and silica with your handheld tools all day long. But the moment you encounter a massive silver deposit, the game hits you with a "Requires Mining Laser T1" error and refuses to elaborate.
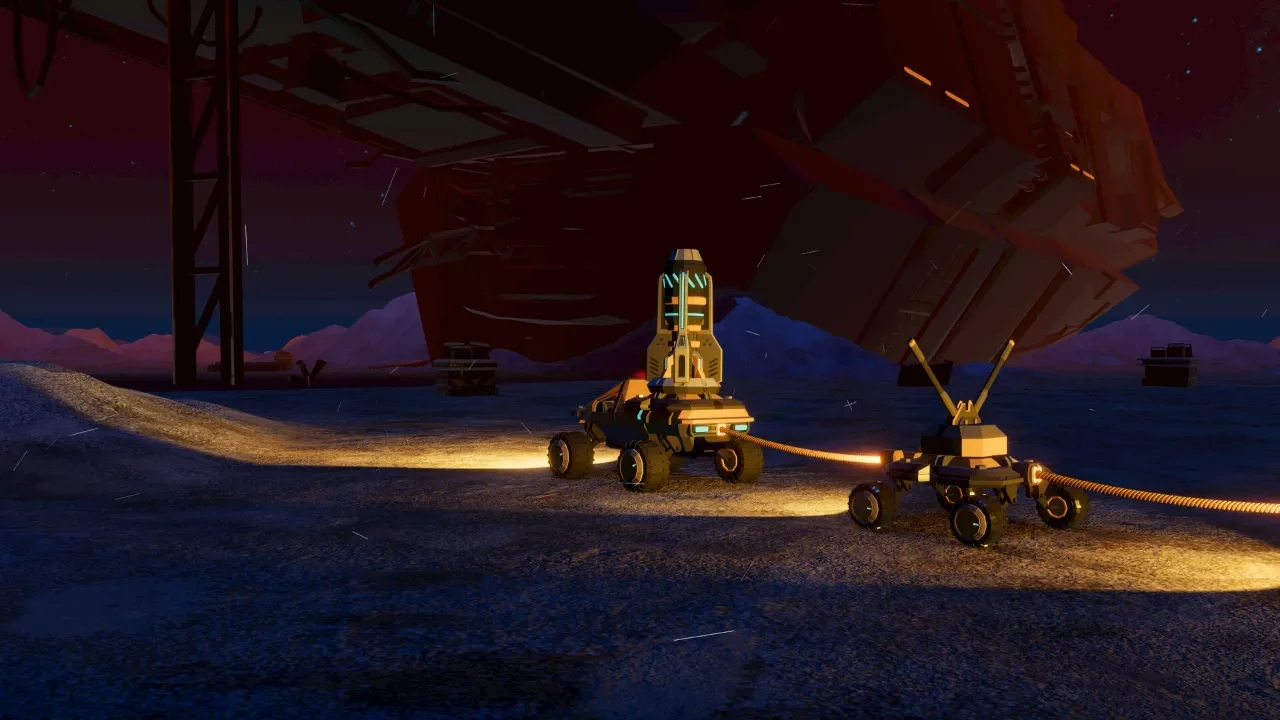
To harvest these massive nodes, you need a mobile industrial setup. You have to craft a wagon and snap the Mining Laser T1 directly on top of it. That part is somewhat intuitive. The part that is driving players insane is actually moving the wagon. You cannot just bump into it and expect a tow cable to magically attach. You must connect your rover to the specific side of the wagon that has the yellow prongs protruding from it. The connections are strictly directional. If you are trying to pull a wagon from the back, you will just spin your wheels in the dirt and look ridiculous.
The T3 Mining Laser is Not a Bug
There is a moment in the mid game where players unlock the highly anticipated Tier 3 Mining Laser. You open up your vehicle crafting tab to slap it on your shiny new rover, and it is completely missing. I spent ten minutes restarting my game because I was absolutely convinced my save file was corrupted.
You are not crazy, the menu organization is just awful. The Tier 3 Mining Laser is not a vehicle attachment. It is a massive, permanent stationary structure. Because it is a building rather than a rover part, the game quietly hides it over in the "Production" tab.
Batteries Are Mandatory for Stability
If you set up a T3 Mining Laser, connect it to a localized water supply, build a Tier 1 Wind Generator that mathematically outputs the exact 1.5 power per second required, and the laser still refuses to turn on, you have encountered the power fluctuation mechanic.
Wind generators are not perfectly consistent. The moment the wind dips, your machine loses power and shuts down. The game does not explain this to you. The absolute golden rule of base building is that every single power grid needs a battery buffer. Even a tiny, cheap battery placed in the circuit will absorb those micro fluctuations and keep your heavy machinery running smoothly.
Stop Fighting the Storage Shelves
The physical storage shelves in this game look fantastic. Being able to see exactly what you have hoarded at a quick glance is great for immersion. Actually interacting with those shelves is a complete nightmare. The hitboxes are tiny, and trying to pull a specific piece of iron out of a dense stack usually results in you grabbing the wrong item three times in a row.
You need to automate your storage as fast as humanly possible. Unlocking the auto storage modules and building a fleet of mining drones will save your sanity. However, drones are incredibly stupid. They will mine whatever is closest and completely fill your beautiful new auto storage cabinets with endless piles of useless sulfur.
To fix this, you have to manually create filters. The auto storage modules will only accept items that match the very first slot. If you want a cabinet dedicated entirely to copper, place exactly one piece of copper in the front slot of that specific shelf. The drones will recognize the filter and deposit their copper there, while taking their random garbage somewhere else.
Resources Are Finite
This is a bitter pill to swallow for automation fans. The resource nodes scattered around the map do not respawn. When you mine a crater completely dry, it stays dry forever.
Do not panic, though. The map is absolutely massive and dense with materials. You will not soft lock your save file by building too many solar panels. It just means you cannot stay in one place forever. When your local drones start throwing "No deposit found" errors, it is time to pack up your wagons and drive your mechanical circus to a fresh biome.
Thorium and Lithium Are Not Important Yet
During your deep exploration runs, you will eventually scan and discover late game ores like Thorium and Lithium. Your survival instinct will tell you to mine as much as possible and hoard it for a massive, game changing industrial reactor.
You can stop stressing. Right now, those rare ores are exclusively used in the base building decoration tab. You use Thorium to build chairs, tables, and jukeboxes. Unless you are incredibly passionate about interior design, do not let these ores clog up your limited wagon storage while you are trying to establish your core terraforming loop.
How to Actually Make it Rain
The entire point of the game is pushing the atmosphere from a dead red rock into a vibrant blue sky. Atmospheric pressure builds beautifully. You scale up your drills, solve massive power grid puzzles, and slowly watch the bar fill.
Then you hit the soil and biology stages. The pacing here is wildly erratic. Do not waste your time building massive farms of Tier 1 Biospray towers. The progression moves so fast that by the time you finish building your third T1 tower, you will have already unlocked the T3 variant. Save your resources and just wait for the upgrades.
Eventually, the game demands that you reach Stage 5 terraforming to unlock the T3 Collider. Stage 5 requires rain. To make water fall from the sky, you have to transition from basic moss to actual flora. Use your Genetic Collider to combine your early seeds until you unlock Tier 2 Shrubs. Plant those shrubs in your Sprinklers, combine the excess shrubs to form your first proper trees, and watch the clouds roll in.