Fortnite Boss Sprite Guide: Locations, Stats, and Health Buffs
If you are tired of getting sent back to the lobby by a stray sniper shot, you need to track down the ultimate defensive companion.
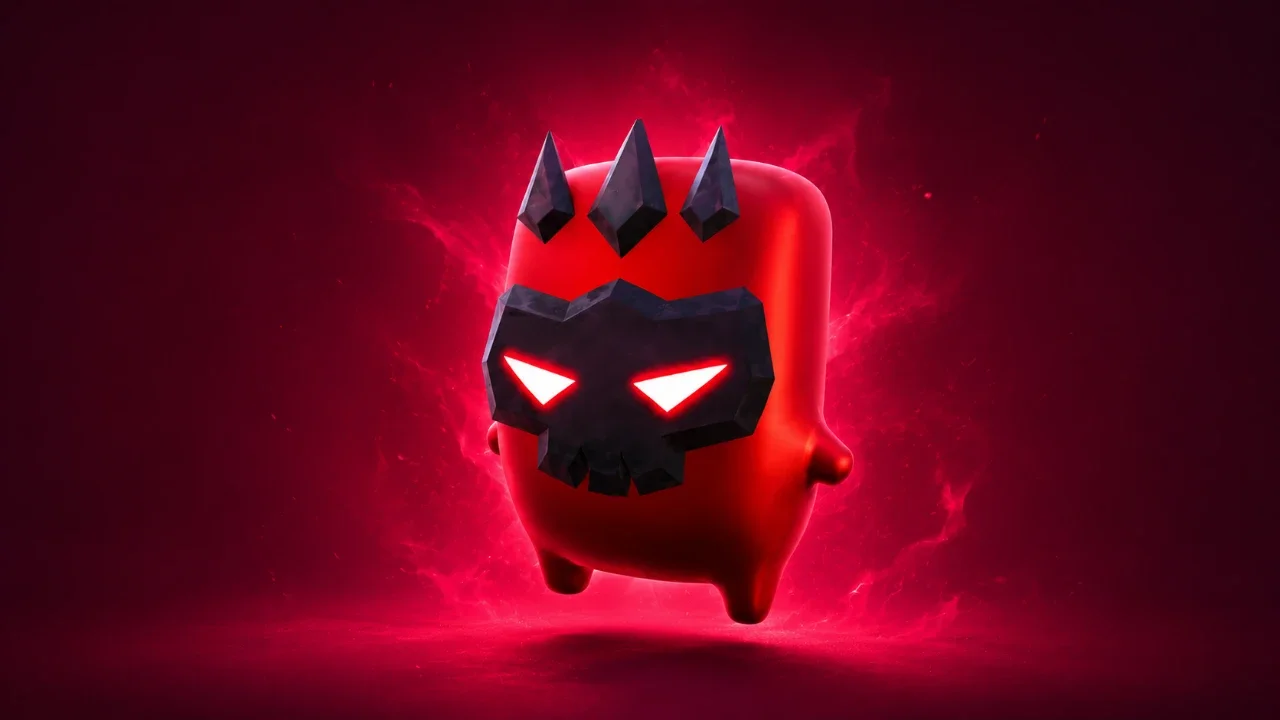
The v41.10 update just hit the servers and injected five brand new Sprites into the wild. While everyone else in your match is scrambling to collect the flashy Striker and Grim Reaper companions, I highly recommend you focus on actual survival. The new Boss Sprite easily takes the crown for raw defensive utility, giving you the ability to tank a ridiculous amount of damage when a fight goes completely sideways.
Before you drop blindly into a hot zone and get wiped out by a coordinated squad holding mythic weapons, you need to understand how to hunt down the island bosses and extract their loot safely. I spent time mapping out their spawn patterns and testing the shield modifiers so you can build a proper tank loadout.
Tracking the Island Bosses
To secure this heavy duty companion, you have to go toe to toe with the deadliest AI targets currently roaming the map. They do not hand over their loot politely.
The Active Boss Roster
Epic Games limited the island to exactly three active bosses per match. If you want this specific drop, you will be hunting down Voidblade, Wolfe, or Skeletor. Because the match count is strictly capped, there are only three guaranteed Boss Sprites available from these targets. Once you drain their massive health bars, they drop the companion right onto the dirt alongside their standard Mythic Items.
Rotating Spawn Zones
Unlike previous seasons where targets stayed glued to a single fortress while you plotted an ambush, these three rotate through a massive list of preset coordinates. You will primarily find them wandering the terrain around Calamari Canyon and the Frosted Flats. If you want a deeper dive into their weapon drops and combat patterns, check out my Fortnite Chapter 7 Season 3 boss locations and loot guide to prep your armory.
Otherwise, you need to systematically check these specific spawn points to force an encounter:
North of Heatwave Harbor.
Among the trees directly north of Calamari Canyon.
The Collider Corridor north of Calamari Canyon.
Near the Extractor Point northeast of Calamari Canyon.
The snowy stretch between Battlewoods and Wonkeeland.
The snowy patch southwest of Latte Landing.
West of The Battlewoods.
Near the trees where Battlewoods meets the Zero Point.
At the Extraction Site west of Golden Grove.
Alternative Loot Sources and Extraction
If you do not feel like burning through your entire ammo reserve trying to take down Wolfe while a third party shoots you in the back, you have a few backup options to secure the pet.
Chest Farming and Combat
You can occasionally pull the Boss Sprite from regular Chests and specialized Sprite Chests scattered across the map. This random drop chance is also how you can stumble across the highly coveted Gold, Gummy, and Galaxy variants of the pet. Alternatively, you can just wait for someone else to do the hard work, eliminate them, and steal the companion right off their loot pile.
Securing Your Pet
Finding the pet is only the first step of the process. If you die with it in your backpack, you lose it. You have to extract it to permanently lock it into your Sprite Collection. You can risk running to a public Extraction Point and defending the zone, or you can deploy a Portable Extractor if you prefer a stealthy exit. Once it sits safely in your collection, you can summon it during future drops without relying on the boss spawns at all.
Health and Shield Buffs
Equipping this companion basically gives you a permanent, scaled down version of the old boss medallions that used to dominate the meta.
It instantly increases your maximum health and shield thresholds, letting you absorb significantly more punishment during a messy firefight. As you level up the companion, your overall survivability scales right alongside it.
The scaling values grow steadily through the ranks, making the final level an absolute powerhouse for health pools. The extra 25 points of buffer are easily the difference between winning a close duel and returning to the menu empty-handed.