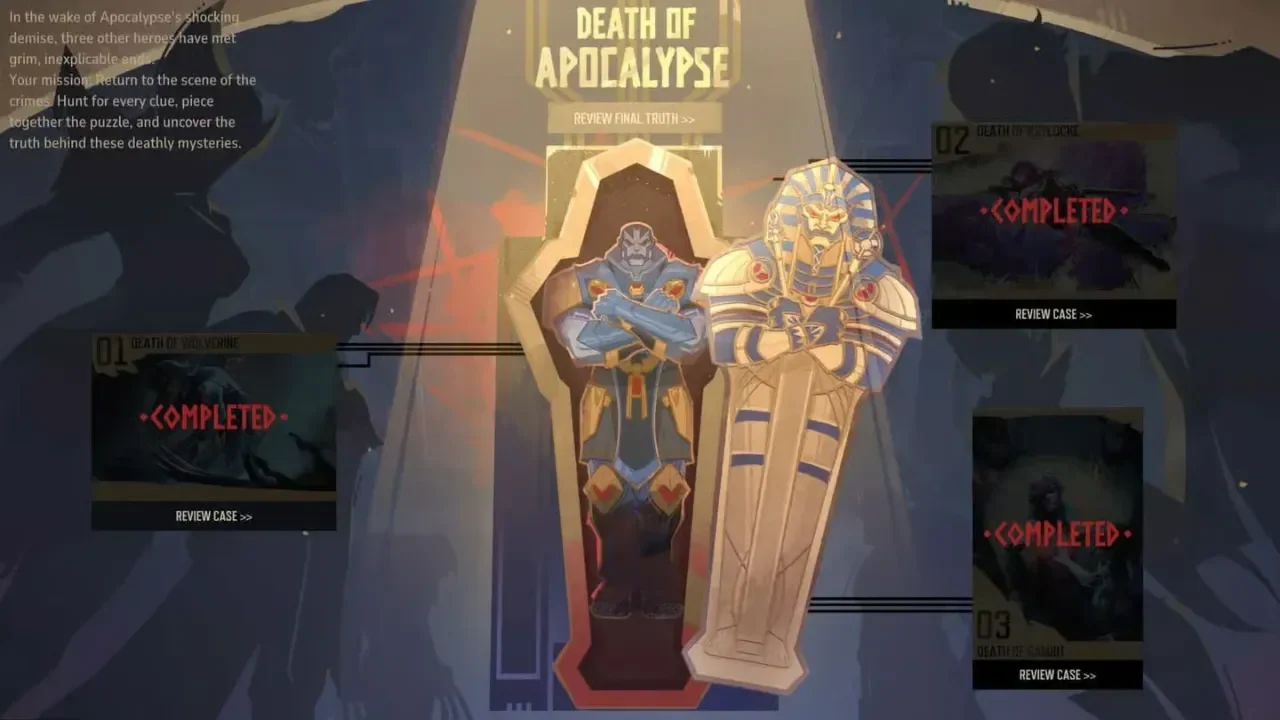
Marvel Rivals Cyclops Guide: How To Master The Punch Dimension
Scott Summers arrived in the Season 8.5 update as a straightforward Duelist who excels at punishing packed groups from a very safe distance.
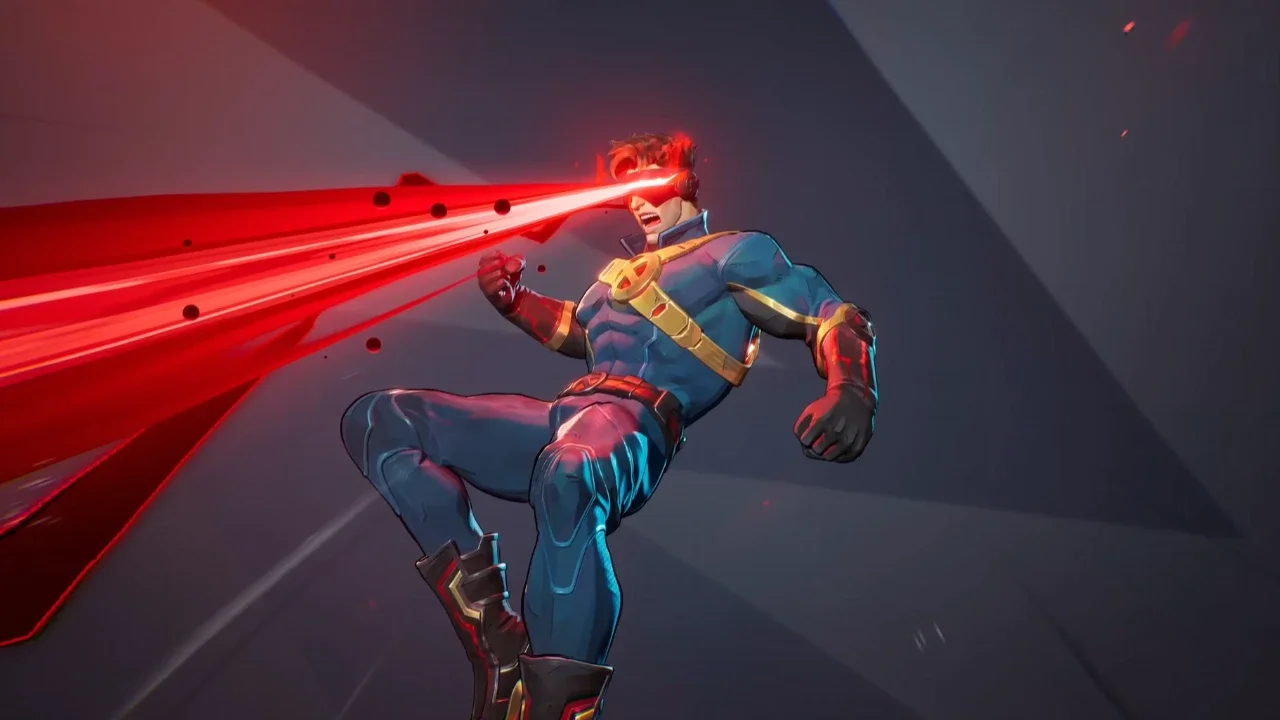
NetEase skipped the overly complicated setups this time around and gave Cyclops a clean 2-star difficulty rating. He drops in with 275 HP and a pure hitscan toolkit that rewards precise aiming without forcing you to memorize dense ability rotations. You can easily delete a 300 HP target from 40 meters away with consecutive headshots because his lasers have incredibly low damage falloff.
Firing Mechanics and Energy Management
Your basic combat rhythm mostly involves swapping between single targets and narrow choke points depending on how the enemy team positions themselves.
Your primary attack is Optic Blast. It fires instant hitscan bursts that are great for pinning down isolated targets in a direct duel. It deals 25 damage per tick and runs 3 hit checks per attack, using a quick 0.6 second attack interval.
When the other team decides to cluster together in a tight hallway, you want to switch to your secondary Concussive Beam. This channels a continuous laser that refracts across the environment and other characters. It deals 11.5 damage per tick at a fast 0.083 second tick rate. The character refraction falloff sits at 50 percent, meaning the damage drops by half when it bounces between targets, though it will never drop below a 10 percent minimum cap. The environmental ricochet falloff is a bit lower at 30 percent. This continuous beam drains your resources quickly at a rate of 25 energy per second, but you passively recover 10 energy per second the moment you stop firing.
Every single hit you land with either your primary blast or your secondary beam actively shaves 0.15 seconds off the cooldown of your Ricochet Force ability, which helps you throw out your tracking finishers much more often.
Using the Kinetic Hover
Activating that secondary laser while you are mid-air automatically triggers your Kinetic Hover passive. This puts you into a slow-fall state, which is incredibly useful for tracking targets hiding behind low barriers or walls. Just keep in mind that floating slowly through the sky makes you a very obvious target for anyone else scanning the horizon, so use it carefully.
Catching Evasive Targets
When someone manages to slip away around a corner with a tiny sliver of health, you don't have to sprint after them. Your E-key is Ricochet Force, a tracking finisher that holds two charges. It fires an 80 damage beam that bounces off terrain and automatically locks onto targets within a 12-meter range. It easily negotiates tight angles to finish the job for you, and it even grants you a bit of bonus health on use.
The beam has a 2 second base cooldown between charges and a 15 second total recharge time. The damage scales based on how it bounces. Character refraction falloff is 50 percent and environment falloff is 65 percent. Environment refraction falloff starts at 20 percent at 8 meters and scales up to 40 percent at 12 meters. If you manage to get multiple refractions, the damage increases by 10 percent per bounce up to a 20 percent maximum cap. It is a highly reliable tool for cleaning up low-health opponents who think they successfully broke your line of sight.
Managing Aggressive Flankers
Playing a long-range threat means you will eventually get jumped by an aggressive character trying to clear you off the high ground. Cyclops has two distinct movement tools to help you reset the distance.
Your L-Shift is Propulsion Burst. It drives both you and your target backward between 11 and 22 meters while applying a 35 percent slow to them for two seconds. It deals 5 damage per hit over a duration that lasts anywhere from 0.35 to 1 second depending on the distance, and it operates on a 12 second cooldown. The best part about this tool is that you can steer it omnidirectionally. Instead of just launching yourself straight backward into a dangerous open area, you can easily slide yourself right around a safe corner.
If someone manages to close the gap anyway, you can tap your F-key for Optic Ascent. This launches you 12 meters straight up into the air over a brief 0.6 second window. It deals 5 damage per hit, grants you a 35 percent movement speed boost, and leaves your attacker dealing with a 35 percent slow on the ground beneath you. It uses a 12 second cooldown and gives you an immediate high-ground advantage to turn the duel back in your favor.
Breaking Barriers With Ruby Rage
Your ultimate ability is Ruby Rage, and it is built to completely clear out objectives by destroying all active barriers across a massive 60-meter maximum range. It costs 3700 energy to deploy and works in two distinct stages.
The initial blast creates a 2-meter wide field that deals 75 damage plus an extra 20 percent of the target's maximum health. After a 1.1 second interval, a secondary 8-meter wide field detonates, dealing another 75 damage plus 40 percent of their maximum health. Because the explosive damage scales directly off the size of their health pools, it can completely delete heavy frontline vanguards. Fast characters can easily step out of the path if you fire it prematurely, so it pays to wait until your team locks them down in a tight choke point before you rip off your visor.
The Wolverine Synergy
If you have a teammate who likes to play Wolverine, Cyclops activates a unique Team-Up passive called the Red Adamantium Factor.
Just being on the field together hands Wolverine a flat 5 percent damage boost and noticeably extends the reach of his basic melee attacks. It also completely replaces his standard Vicious Rampage ability with Kinetic Claws, giving him a fast forward lunge that unleashes a storm of spinning slashes. It lets your frontline partner run in and cause absolute chaos with his extended range while you sit back and focus on landing clean headshots.