Over The Top WWI Beginner's Guide: Tips, Classes & Survival Strategies
Raw aim will not save you from a creeping artillery barrage or a collapsed bunker full of poison gas.
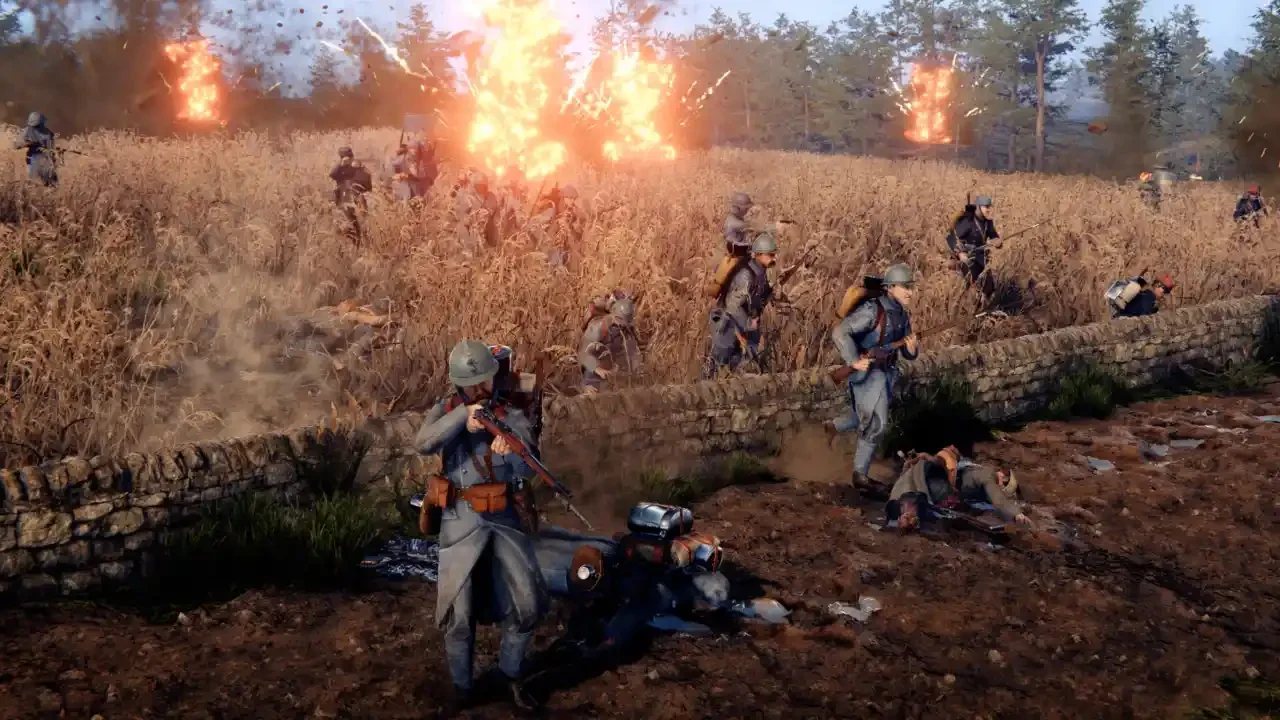
Massive 200-player lobbies, fully destructible battlefields, and proximity chat that will either make you cry laughing or instantly mute the server. Over The Top: WWI is a frantic sandbox of destruction that actively punishes anyone who treats it like a generic run-and-gun shooter. I have spent enough time getting obliterated by random artillery strikes and suffocating in muddy craters to realize that reflexes alone mean nothing here. You need sharp situational awareness, a decent grasp of the class mechanics, and the common sense to avoid piling into a single trench with twenty other teammates. Here is my expanded survival manual for navigating the absolute chaos.
Finding Real Players and Avoiding Bots
The matchmaking system is currently tricking new players, so let me save you a massive headache before you even deploy.
If you hit the quickplay button, you will likely end up in a lobby with five actual humans and 195 brain dead bots running in perfectly straight lines. The bots are blind, nonreactive, and completely ruin the chaotic magic of the game. You must use the server browser. Look for heavily populated servers. As real players join, the game automatically kicks the bots to make room. Anything with over 80 active players is usually a guaranteed human warzone.
For those who absolutely despise third-person cameras in competitive shooters, the community is already hosting dedicated first-person only servers. You can easily filter for these in the browser to get that immersive trench experience. Also, if your internet cuts out or you just want to practice, you can absolutely keep leveling up your account offline. The progression cap is currently level 100, so you have plenty of grinding ahead of you.
Understanding The Universal Perks
Before we look at the specific roles, you need to understand the progression system. Every class across all three playable nations shares the exact same perk tree. You unlock these by spending the experience you earn from basically doing anything productive on the battlefield.
The Frontline Grunts
Playing the standard combat classes requires a specific tactical mindset if you actually want to impact the flow of the match. Running straight into a meat grinder just drains tickets. If your team is completely bogged down by heavy enemy fire, do not add your body to the pile. You need to maneuver. Look at your map, identify where the enemy is focusing their attention, and flank them.
The Rifleman
The standard grunt is surprisingly lethal. Bolt action rifles outrange almost everything in the game except dedicated sniper scopes. Your job is to find good sightlines, bunker down in the trenches, and pick off machine gunners or enemy officers. You can also equip a wrench to repair friendly tanks, which massively increases their lifespan on a contested point.
The Stormtrooper
This class is built entirely for close quarters trench clearing. Do not run across open fields with a shotgun. You cannot challenge rifles at a distance, and you will just die tired. Stick close to your Officer, wait for them to pop smoke, and then push aggressively into the enemy fortifications to clean house.
The Sniper
Please do not just sit in the back of the map padding your kill count. Your primary objective is eliminating the head of the snake. You need to constantly check your map, track troop movements, and prioritize taking out enemy Officers. Flanking is everything. If a friendly point is getting hammered by artillery, communicate with your team and hunt down the Officer calling it in.
The Specialist
These guys are your dedicated anti-armor and bunker clearing units. Equipped with anti-tank rifles and flamethrowers, you are terrifying in a tight space. However, your health pool is fragile. You cannot trade shots with a Rifleman. You have to play patiently, flank wide, and roast the trenches from behind.
The Armored Cavalry
This is the tank class. You spawn with a giant metal plate strapped to your chest, allowing you to absorb an absurd amount of punishment. Your entire purpose is to break stalemates. Charge directly into the chokepoints and absorb the incoming fire so your Riflemen and Stormtroopers can finally push forward. It is a pure commitment role.
The Heavy Gunner
Right now, this class is an absolute menace. The Heavy Gunner operates on a heat mechanic rather than standard reloading. If you manage your heat properly, you can lay down infinite suppressing fire. A coordinated nest of Heavy Gunners can lock down an entire sector of the map, and if someone manages to flank you, you can just pull out a revolver and defend yourself.
Weapon Realities
The weapon physics here might catch you off guard. Standard rifles and heavy machine guns have significantly more effective range than you probably think. If you spot a static heavy gunner in the distance, take the shot and spend the ammo.
Conversely, the mortar is highly misunderstood. Players pick it up thinking it will print free kills, but the accuracy drops off aggressively over long distances. It is vastly inferior to a heavy cannon for long-range bombardments. Melee combat is also highly situational. A bayonet charge looks incredibly cinematic, but running headfirst at a guy with a loaded rifle usually ends poorly. Reserve your melee attacks for ambushes or jumping over sandbags to catch defenders completely off guard. Oh, and if you want to humiliate someone, you can literally slap them with a baguette. The sandbox is beautifully unhinged.
Mastering the Engineer
A bad engineer will actively sabotage their own team by building useless death traps. You hold the structural integrity of the frontline in your hands.
Trench Digging 101
Every class can carry a basic digging tool, but the Engineer dictates the shape of the battlefield. The golden rule of excavation is simple. Never dig a completely straight trench. A straight trench allows a single enemy machine gunner to sweep the entire line and wipe out your squad in seconds. You must build corners, zig-zags, and sharp bends.
You also have to anticipate failure. Design your fortifications so they are difficult for the enemy to use against you if the objective falls. Build protected firing positions that overlook the main pathways, allowing your team to throw grenades into the trenches as the enemy tries to advance. A few pickaxe swings, a sandbag, and a half-built concrete wall can lock down an entire sector. Furthermore, if a friendly tank gets stuck in a deep trench, use your shovel to lessen the incline of the dirt wall so the driver can escape.
Spawn Point Management
The most important job you have is providing a safe forward spawn point for counterattacks. A captured objective is highly vulnerable in the first few minutes of a transition. Your team needs a hidden spawn in a crater or behind a concrete wall to immediately push back.
Crucially, you must manage the spawn cap. Your team can only have three active spawns at a time. If the frontline moves forward, an outdated spawn sitting miles behind the action is a massive liability. Equip your hammer, switch to destroy mode using your melee key, and hit your old spawn points to clear them out. Be courteous and clean up your own outdated equipment before you start destroying a teammate's hard work.
The Officer's Burden
If you pick the Officer class, you are no longer just a frontline soldier. You are the lifeline keeping the assault from completely stalling out.
The Mobile Spawn and Support
As an Officer, your physical body acts as a mobile spawn point. You need to stay alive in critical, aggressive positions so your team can flood the objective. You are most effective when operating far away from the static Engineer spawns, actively looking for weak points in the enemy line. If your positioning is exceptional, a smart Engineer might even find you and upgrade your location into a permanent forward spawn.
You also have a dedicated call-in menu accessed by pressing the Alt key. These abilities cost credits to use, which regenerate over time and through scoring points like capturing zones. You can drop smoke screens to blind snipers or unleash deadly chlorine gas to clear out stubborn bunkers.
Directional Destruction
The Air Strike and the Artillery Creeping Barrage are highly unique because they are directional. You use your mouse to rotate the strike angle before confirming the call-in. Pay strict attention to the red overlay on the ground.
Friendly fire is very real in this game, and calling a creeping barrage directly onto your own charging infantry is a great way to get universally hated by the server.
Do not forget your secondary duties. You can press the C key to initiate an Officer Charge, which grants nearby allies a massive boost to movement speed and melee damage. This ability is mandatory when crossing open terrain under heavy fire. You must also use your spotting flares to reveal hidden enemies, and deploy your balloon to block enemy officers from dropping artillery on your heavily contested points. A well placed counter-balloon can stop an entire enemy advance dead in its tracks.