Subnautica 2 Survival Guide: How To Not Die In The First Hour
Getting dropped into an alien ocean is a death sentence if you don't know which plants to stab and which slugs to squeeze.
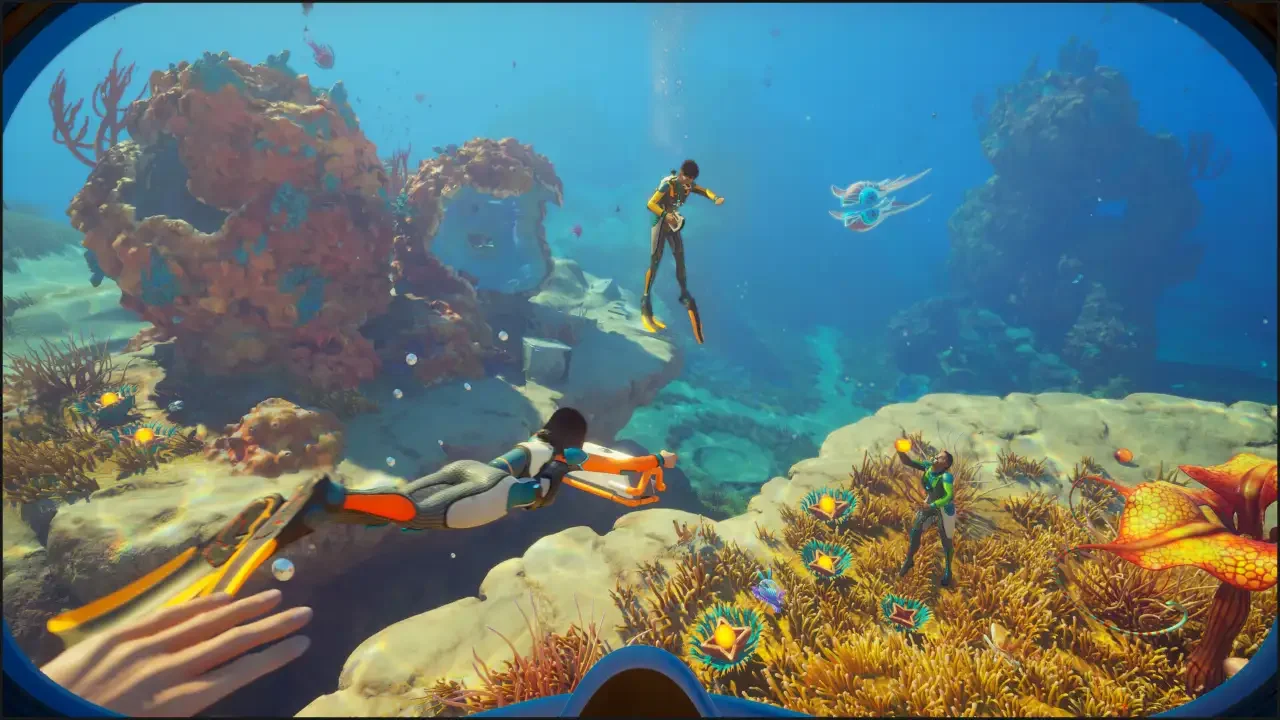
I spent my first few hours in the Subnautica 2 Early Access testing the limits of my oxygen tank so you won't have to. The ocean is gorgeous, but it is basically a giant liquid blender trying to turn you into a nutrient paste. If you want to actually see the sights instead of staring at a respawn screen, you need to follow a specific path. The Noetic Advisor (NOA) in your Lifepod will try to point you toward black boxes, but I am telling you to ignore those until you have the basics sorted.
You need to prioritize tools and adaptations before you start playing hero. Before you waste your first life chasing a signal that is too deep for your lungs, follow this checklist to ensure you actually have a chance at reaching the surface again.
Step One: Hydration and Self-Defense
The very first thing you'll notice is that your survival meters are ticking down fast. You can't just drink the ocean, so you have to find a workaround immediately.
Squeezing the Slugs
I've found that the easiest way to stay hydrated early on is to look for Water Slugs. These are translucent blue creatures scattered across the ocean floor. Grab a handful of them and head back to your Lifepod. The Fabricator under the Sustenance menu will turn them into drinkable water.
Crafting Your First Multi-Tool
While you are out hunting slugs, keep an eye out for Titanium. You only need three pieces of it to craft the Survival Multitool in the Personal menu of your Fabricator. This is your primary interaction tool, and without it, you are basically defenseless and unable to harvest the more advanced materials you'll need for the next step.
The "Don't Drown" Button
If you happen to see any glowing orange orbs on the ground, grab them. These are Lucifer Rotsacs. You can turn two of them into Rubber, which combines with two Titanium to make an Air Bladder. I'm telling you now, this thing is a literal lifesaver. It refills 25 oxygen instantly and can rocket you to the surface when you've stayed down too long. It's the difference between making it back to your pod and ending up six feet under.
Step Two: The Scanner and Battery Grind
Once you aren't in immediate danger of dying from thirst, you need to build a Scanner. This is the most important item in your inventory because it unlocks every other blueprint in the game.
To build it, you'll need two Titanium, two Quartz, and a Basic Battery. Copper and Acidic Raion Pouches are required for the battery. I recommend swimming into the hole directly beneath your Lifepod to find the Copper on the walls and the purple and green plants for the pouches. Just watch your breath, and use those blue-bubble plants to top off your tank while you work. For the Quartz, head to the nearest Coral Dome (those orange rock structures) and peel it off the walls.
Once you have that Scanner, scan everything. If it moves, scan it. If it’s a piece of junk, scan it. You need multiple scans for things like Habitat Builders and Flashlights before you can actually build them yourself.
Step Three: Overcoming Hunger Intolerance
You might have noticed that eating the local fish or plants makes you sick. This "Hunger Intolerance" is a massive hurdle until you unlock the Digestion Adaptation.
I've pinpointed the location you need to visit to fix this. Swim about 158m northeast of your Lifepod. You're looking for a massive pink plant called the Angel Comb. Interacting with the bulb on this plant unlocks the Digestion Adaptation. Once you have this, you can finally stop relying on the meager rations in your Lifepod storage and start cooking the fish you catch.
Step Four: Scavenging For Blueprints
You can't craft the best tools until you've found their broken remnants in the wild. I've tracked down the easiest spots to get your initial blueprints so you don't have to wander aimlessly.
Essential Tool Locations
Before you can build a base, you need the Habitat Builder. I found one inside the Welcome Center, which is about 85m southeast of your starting point. You'll need to swim through a hole in the floor to find it. Another one sits on a platform near that Angel Comb I mentioned earlier. As for Flashlights, check the open containers in the Coral Dome just east of the pod or at the bottom of the hole directly underneath you.
Advanced Exploration: Bases and Adaptations
Once you have your fins and a standard air tank, you can start pushing into the more dangerous areas. Silver is going to be your biggest bottleneck. I found the most luck looking in shallow caves about 300m north of the Lifepod.
Dealing with Heat and Corruption
Eventually, the NOA will lead you to a black box called "Wander." This takes you into a cavern with glowing blue nodules called Bloom Cankers. You won't be able to do anything here until you have a Sonic Resonator. Use it to blast those nodules and cleanse the corrupted Angel Comb nearby. Doing this grants you a second Adaptation that lets you resist high temperatures. Without this, trying to explore volcanic vents or deep thermal areas will send you back to the lobby faster than you can blink.
Visiting the Abandoned Hubs
There are two major abandoned sites you should visit as soon as you have decent oxygen: Camp One and the Old Habitat.
Camp One (250m NNE): Great for scanning the Scanner Station and the Wakemaker.
Old Habitat (420m NNW): This place is a goldmine for scanning the Sonic Resonator and Bioreactor fragments.
If you follow this path, you'll go from a panicked castaway to a fully geared explorer with a permanent base in no time. Just remember to keep that Air Bladder on your hotbar. You'll thank me when you're 200 meters down and your tank starts whistling.
Still struggling to survive on Proteus? Check out my complete Subnautica 2 Guide Hub for base building tips, resource maps, and more.