007 First Light Guide: How to Find All 10 Postcards

Before you waste hours scouring every corner of the globe, know that finding all ten postcards is the only way to prove you actually paid attention to the scenery.

James Bond is supposed to be saving the world, but apparently, he also has a soft spot for collecting tourist memorabilia. 007 First Light features a massive amount of hidden items, but the postcards are entirely tied to The World Is Not Enough achievement.

Essential Rules and Prep Work

Before you start tearing apart every single room you walk into, you need to understand the rules of this specific scavenger hunt. There are exactly ten postcards in the entire game. Not every level has one, and no level ever has more than one. Once you grab the postcard for a specific area, you can stop looking.

If you missed a few on your first playthrough, don't panic. The game features a highly forgiving Chapter Select menu that lets you drop into specific checkpoints. The moment you pick up a collectible, the game auto-saves it to your profile. You can literally grab the card and immediately quit out to the main menu without losing your progress.

Before you start jumping around the timeline, you need to make sure your loadout is correct. During Chapter 9, you get access to the gadget table in Q-Lab. You absolutely must equip the Laser Strap gadget here to melt a lock for the postcard in Chapter 10. If you are unsure what else you should bring into the field to survive, check out my complete gadget tier list to optimize your gear.

All Postcard Locations

I organized every single postcard by its chapter, the exact checkpoint you need to load, and where it is hiding.

Chapter & Checkpoint Where to Look
Chapter 1: Against the Odds
Checkpoint: 06 Central Camp
Drop down into the enemy camp and look for the shipping container labeled B2 on your right. Sneak inside, silently take down the guard sitting at the desk, and grab the Iceland Postcard right next to his computer and lamp.
Chapter 3: The Needle's Eye
Checkpoint: 01 Basic Training
After the car ride with Greenway, you are told to follow him to the other recruits. Ignore him. If you follow him too far, a cutscene triggers. Instead, look to your right to find a small fold-out table holding some water bottles. The Malta Postcard is resting right there.
Chapter 8: All the Time in the World
Checkpoint: 07 Accessing Room 206
While hunting the blond man outside Room 206, look for a maid pacing the hallway near Room 205. Use your Q-Watch on the vacuum or shoot her with the Dart Phone to distract her. Pickpocket the Room 205 keycard off her, go inside, and grab the Slovakia Postcard off the nightstand.
Chapter 10: The Past Never Dies
Checkpoint: 03 Black Market
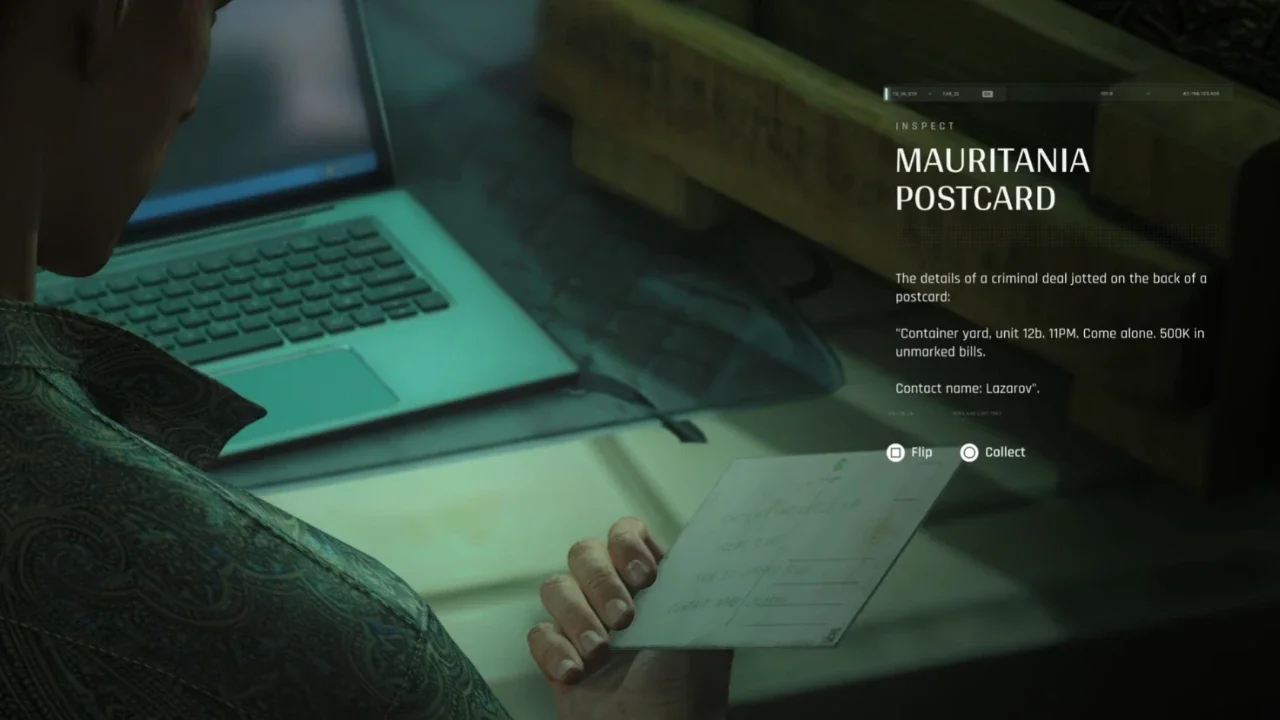
When you are tasked with finding 100K for the auction fee, head left toward a massive red boat anchor. Behind it is a fenced area with a padlock. This is where you use that Laser Strap from Chapter 9. Melt the lock, step inside, and grab the Mauritania Postcard off the table.
Chapter 11: Uninvited
Checkpoint: 06 Security Office
As soon as you steal the guard's key and enter the CCTV room, look at the shelf on your left covered in routers and printers. The Kensington Postcard is sitting there. Grab this before using the computers, because leaving the room locks you out completely.
Chapter 12: Knightfall
Checkpoint: 02 Executive 1st Floor
After Greenway boosts you up to the statue, jump to the next balcony and follow it left. Climb over the railing, select the hang option, and shimmy across the ledge to an open window. Climb inside and grab the City of London Postcard off the left counter.
Chapter 14: Time to Die
Checkpoint: 05 The three targets
Make your way to the Ocean View Bar to talk to Ellis White. (You can hop the railing or steal a Party Flyer to get in). Look to the right side of the bar near the lounging chairs and the water. The Vietnam Postcard is sitting on a table.
Chapter 15: Man of the Hour
Checkpoint: 04 The betrayal
Head into the Q-01 Gym area to steal field equipment. Climb up the tall lockers, jump across to the large filing cabinet ledge, and enter the maintenance hallway. Walk all the way to the end to find the Q-Lab Postcard resting on a table.
Chapter 16: Wave of the Future
Checkpoint: 16 Safety off
Take the lift to the bottom, grab the Override Key, and use your gadgets to kill the android that crashes through the glass. Use the key on the main objective door, walk across the metal beam, and grab the Antarctica Postcard off the rolling cart by the window.
Chapter 17: For England
Checkpoint: 06 Backstairs
Answer the ringing red phone, pick up the earpiece from the dead body, and head through the objective door. Squeeze through the gap in the bookcases. The second you pop out on the other side, look straight down. The MI6 Postcard is on the floor to your right.

Now that your pockets are full of slightly crumpled tourist traps, the achievement should pop immediately after you pick up that final MI6 card. I highly recommend using the Chapter Select feature to clean these up rather than stressing about finding them during your initial story run. Grab your achievement, enjoy the scenery, and try not to get taken out while admiring the view.

Previous
Previous

007 First Light Guide: How to Earn the 100K Auction Fee

Next
Next

Forza Horizon 6 Guide: The Autumn Festival Playlist Hub