ARC Raiders Controlled Access Zone Guide: A Masterclass in Paranoia
The new Shrouded Sky update dropped a co-op button puzzle into the middle of a cutthroat extraction shooter, and the results are predictably terrifying.

Extraction shooters are fundamentally built on a foundation of absolute paranoia. You spawn in, you loot, and you treat every single footstep you hear as an immediate threat to your life. Embark Studios understands this perfectly. That is exactly why they decided to play a cruel psychological joke on all of us with the Dam Battlegrounds map update. They added the Controlled Access Zone. This is a high-value point of interest that locks some of the best loot in the game behind a puzzle you literally cannot solve alone.
You need four people to open the final door. If you queued up solo or even as a trio, you are going to have to find an enemy squad, use your proximity voice chat, and beg them to cooperate instead of shooting you in the face. It is a brilliant piece of game design that generates raw tension. I have spend all day running this gauntlet, getting betrayed, getting rich, and taking notes. Here is exactly how you bypass the security measures and secure the bag without losing your mind.
The Anatomy of a Death Trap
Before you even think about hitting those buttons, you need to understand the layout of the room and how to get inside without getting ambushed by campers.
Infiltrating the Dam
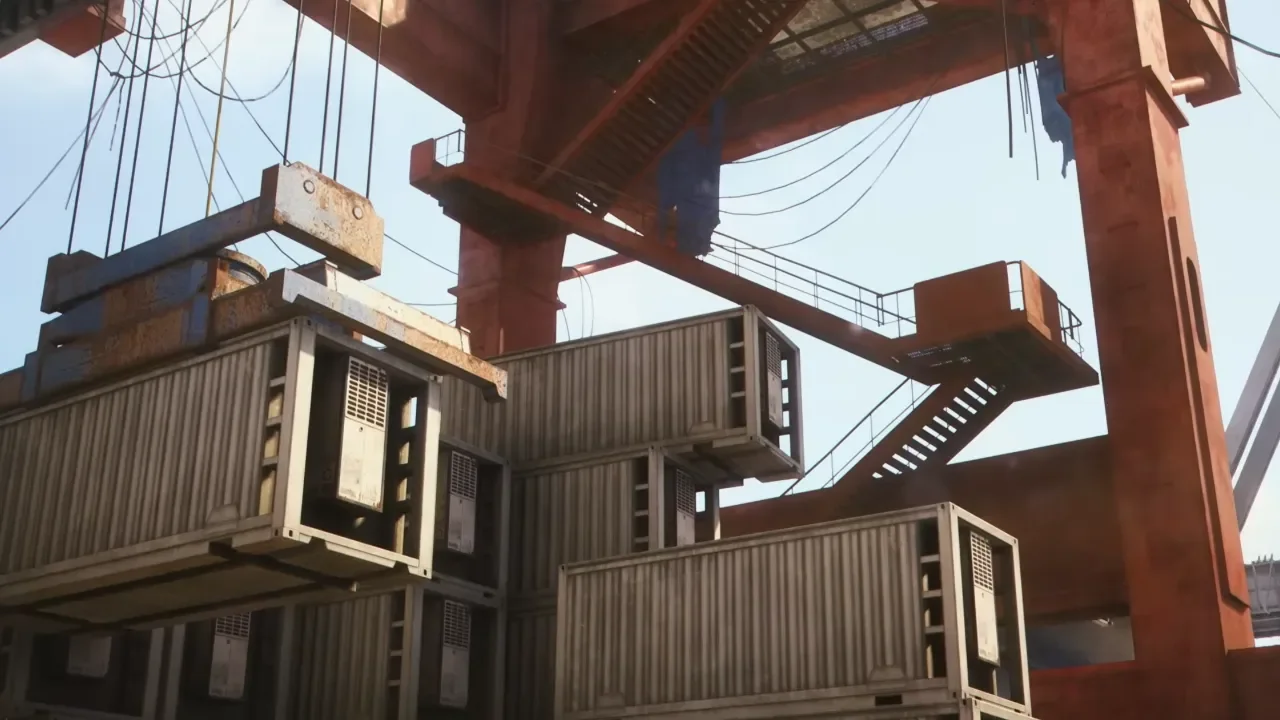
The Controlled Access Zone is located directly south of the Power Generation Complex on the Dam Battlegrounds map. You cannot miss it. It is a massive industrial sector with a giant Rocketeer machine wrapped in creeping vines hanging from the ceiling like a dystopian chandelier.
You have a few options for breaking and entering. You can drop down from the roof through a busted metal grate, which I highly recommend because it gives you the high ground and a clear view of any rats hiding in the corners. You can also slip in through the side entrances on the ground level or walk the long catwalk that stretches underneath the dam itself. Whichever path you choose, clear the room of hostile AI first. You are going to need complete silence for the absolute circus that is about to follow.
Phase One: The Fuel Cell and the Locked Room
You cannot just walk up to the buttons and start pressing them. The puzzle has a sequential lockout system that requires a specific power source to initialize.
Locating the Power Source
Your first actual objective is finding a Fuel Cell. This heavy battery spawns randomly on the bottom floor of the facility. I usually find it tucked away in corners or resting against the base of the massive concrete pillars.
Once you have the Fuel Cell in your hands, you need to haul it up the stairs to the top level of the zone. You will find a generator terminal sitting opposite a heavily locked security room. Shove the Fuel Cell into the terminal. The power will cycle, the lights will flicker, and that locked security room will finally pop open. You need this room open because one of the four mandatory puzzle buttons is locked inside it.
Phase Two: The Button Puzzle and the Enemy Truce
This is where the game stops testing your aiming skills and starts testing your faith in humanity.
Finding the Switches
There are four buttons scattered around the Controlled Access Zone. Three of them have randomized spawn locations for every single raid. You will find them precariously mounted on red pipes, hidden on metal walkways, or bolted to random concrete slabs. The fourth button is permanently located inside the security room you just opened with the Fuel Cell.
You need to scour the room and mentally mark the location of all four buttons. Do not start pressing them yet. If you hit a button out of sequence or the timing is off, the system resets and you have to start over.
The Synchronization Nightmare
To open the main vault door, all four buttons must be pressed at the exact same time. This means you need a body standing at each switch. If you brought a full squad, congratulations. If you are playing solo, you now have to use proximity chat to negotiate a ceasefire with random players who are likely aiming down their sights at your skull.
The tension here is suffocating. I have stood at a button for three minutes sweating bullets while a random sniper across the room aimed at my chest, waiting for someone to count down from three. You have to communicate clearly. Assign a button to each player, do a loud vocal countdown, and interact with the switches simultaneously. The lights above the main vault door will illuminate. The heavy metal will grind open.
Phase Three: The Required Materials
Do not start celebrating just because the big door opened. Embark Studios added one final hurdle to prevent players from just sprinting into the vault and stealing everything.
Fixing the Panel
Inside the newly opened room, you will find a busted control panel next to a second reinforced door. This is the actual entrance to the loot cache. You have to repair this panel by depositing the 12 Metal Parts and the Industrial Battery.
If you came prepared, you just dump the items into the slot and the final door slides open. If you did not bring the materials, you are going to have to run around the surrounding complex frantically opening crates while the random players you just teamed up with start getting impatient. Impatient players with loaded guns are a massive liability. Do the smart thing and bring the materials from your character stash.
Phase Four: The Bloodbath
The final door is open. The loot is exposed. The truce is officially over.
Getting Out Alive
Inside the vault, you will find a massive stockpile of high-tier containers. I am talking stacked Weapon Cases, medical supplies, and rare crafting materials. I even pulled a Mythic Blueprint out of a locked chest on my third run. The rewards absolutely justify the nightmare of getting inside.
But here is the harsh reality. As soon as that door opens, the ceasefire you negotiated is void. It becomes a frantic free-for-all grab. I have seen entire squads get mowed down by a single random player who threw a frag grenade into the vault the second the door opened. You need to grab the most valuable items you can carry and immediately plan your exit route. The noise of the vault opening is incredibly loud and will draw every opportunistic raider on the map directly to your location.
Do not get greedy. Grab your weapon cases, sprint for the nearest extraction point, and watch your back. You just pulled off the most stressful heist in ARC Raiders, and surviving the run to the exfil is the only way to make it matter.