Everything Is Crab Challenge Mode Guide: Surviving The Gauntlet
Before you lose your sanity trying to figure out why your creature suddenly has no attack slots, you need to understand how Challenge Mode actively tries to put you six feet under.
I know exactly how it feels when the standard game loop starts getting too comfortable. You beat a few baseline Pressure levels, you build a solid aquatic army, and suddenly you think you are the apex predator of the entire ecosystem. The developers clearly anticipated that exact level of hubris. They added 15 different Pressure levels to scale up the enemy stats, but if you truly want to test your raw planning and strategy skills, you have to step into Challenge Mode.
While standard Pressure increases simply make the hostile creatures hit harder, these challenges actively break the rules of the game. You face severe restrictions on your genetics, permanently banned evolutions, and bizarre environmental modifiers that completely alter how you approach a run. If you are still struggling with the basics of survival, you should probably consult my Everything Is Crab beginner survival guide before you even think about touching these advanced modifiers. I mapped out exactly how to access this mode and what fresh nightmares await you inside.
How To Unlock Challenge Mode
You do not just get to boot up the game and immediately jump into the deep end. You have to earn your right to suffer. To gain access to the dedicated Challenges Mode, you must first beat a Pressure 2 run.
That means you have to clear the baseline difficulty, start a completely new run on the next Pressure tier, and make it all the way through to the end screen once again. You have to prove you understand the core mechanics before the game lets you tweak the rules. Only after you secure that second major victory will the Challenge Mode option finally appear on your main menu.
The Challenge Tier Progression And Rewards
The challenge system is broken down into seven distinct tiers. You do not get access to all of them at once. You unlock them gradually as you clear higher Pressure runs in the standard game mode.
To move forward in the challenge menu, you only need to beat one single challenge in your current tier to unlock the next one. You do not have to full clear a tier to progress, which is a massive relief when you hit a modifier that completely counters your preferred playstyle. The game actively rewards you for stepping out of your comfort zone. Whenever you manage to beat a challenge in a new tier, you receive a permanent evolution unlock to use in your future runs.
Here are the exact seven evolutions you unlock by progressing through the tiers:
Tier 1 hands you the Burrower evolution.
Tier 2 grants the Overwhelm evolution.
Tier 3 unlocks the Hibernation evolution.
Tier 4 rewards you with the Fin evolution.
Tier 5 provides the Fibroblasts evolution.
Tier 6 gives you the Ambush evolution.
Tier 7 finishes the progression line with the Constriction evolution.
Navigating The Most Brutal Modifiers
Before I drop the full data table in your face, I need to talk about what some of these modifiers actually demand from you. Reading the descriptions is one thing, but experiencing the restrictions in real time is a completely different nightmare.
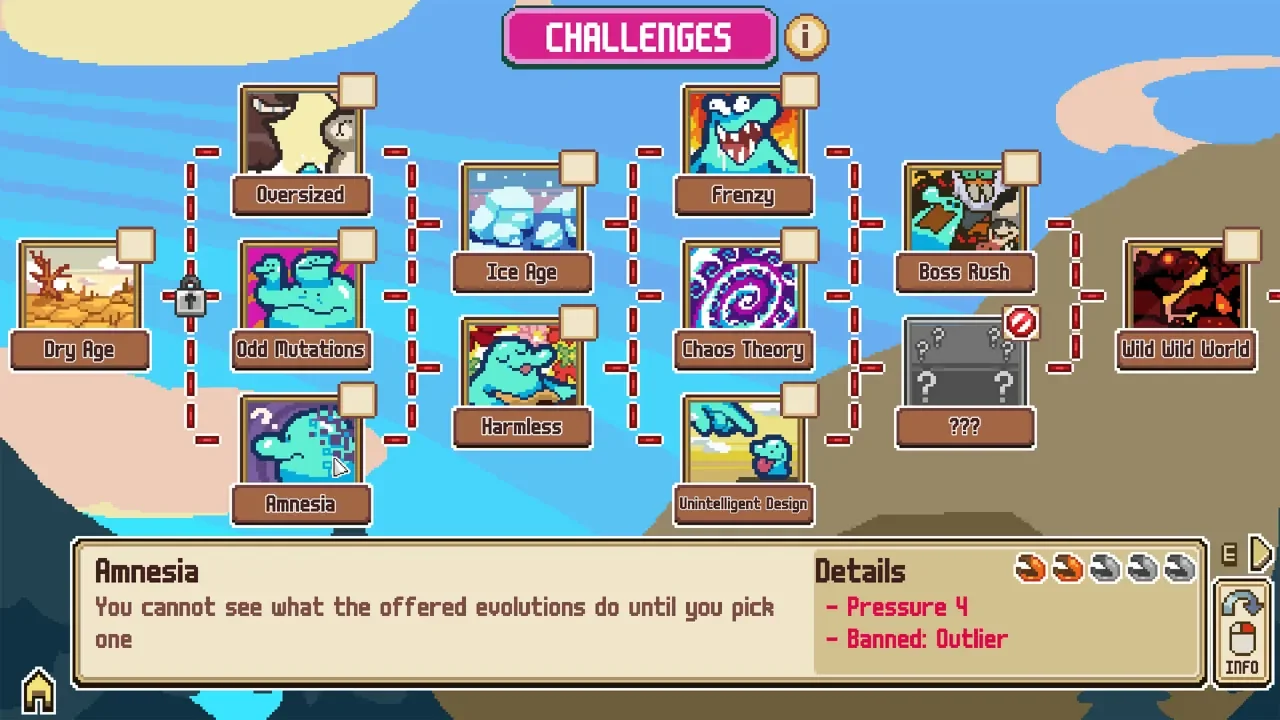
The Amnesia Trap
Amnesia sits in Tier 2 and forces you to play a Pressure 4 run completely blind. You cannot see what the offered evolutions do until you actually pick one. The Outlier trait is entirely banned. You have to rely purely on your memory of the icons and raw luck. If you accidentally pick a trait that ruins your synergy, your run is completely doomed.
Surviving The Harmless Run
Tier 3 introduces the Harmless modifier on Pressure 6. You do not have any attack slots. All direct attacks, attack buffs, and offensive genetics are completely banned. You have to survive the entire run by utilizing pure evasion and alternative survival strategies. It forces you to rethink your entire approach to the map and rely entirely on passive defenses.
The Chaos of Boss Rush and Wild Worlds
Once you push past the halfway point, the game stops playing fair entirely. Tier 5 introduces Boss Rush. The run is drastically shorter, bosses spawn far faster, and the world evolves at a terrifying rate. You only need 20 percent of the normal experience to level up, which forces you to make build decisions in a complete panic. If you manage to survive that, Tier 6 throws you into the Wild Wild World modifier on Pressure 12. Bosses do not wait for their designated arena fights anymore. They just casually roam the wild as normal animals, meaning you can get ambushed by a massive threat while you are just trying to farm some basic meat. It is pure anxiety.
The Wounded Reality
The absolute peak of the mountain is the Wounded challenge in Tier 7. Set on the brutal Pressure 15 difficulty, you cannot heal in any way. All Regeneration evolutions and healing points of interest are banned. The Spawn of Chaos also bans Max HP and HP Regen traits. Every single point of damage you take is permanent. You have to execute a flawless run against the hardest enemies in the game.
The Complete Challenge Roster
You need to know exactly what kind of pain you are signing up for before you lock in a run. I compiled the exact details, restrictions, and unlock requirements for every known challenge currently available in the game.