Mouse P.I. For Hire: All Secret Door Codes In The Depths
If you are currently staring at a panel of four zeros and questioning your life choices, put down the notepad because I already did the heavy lifting.
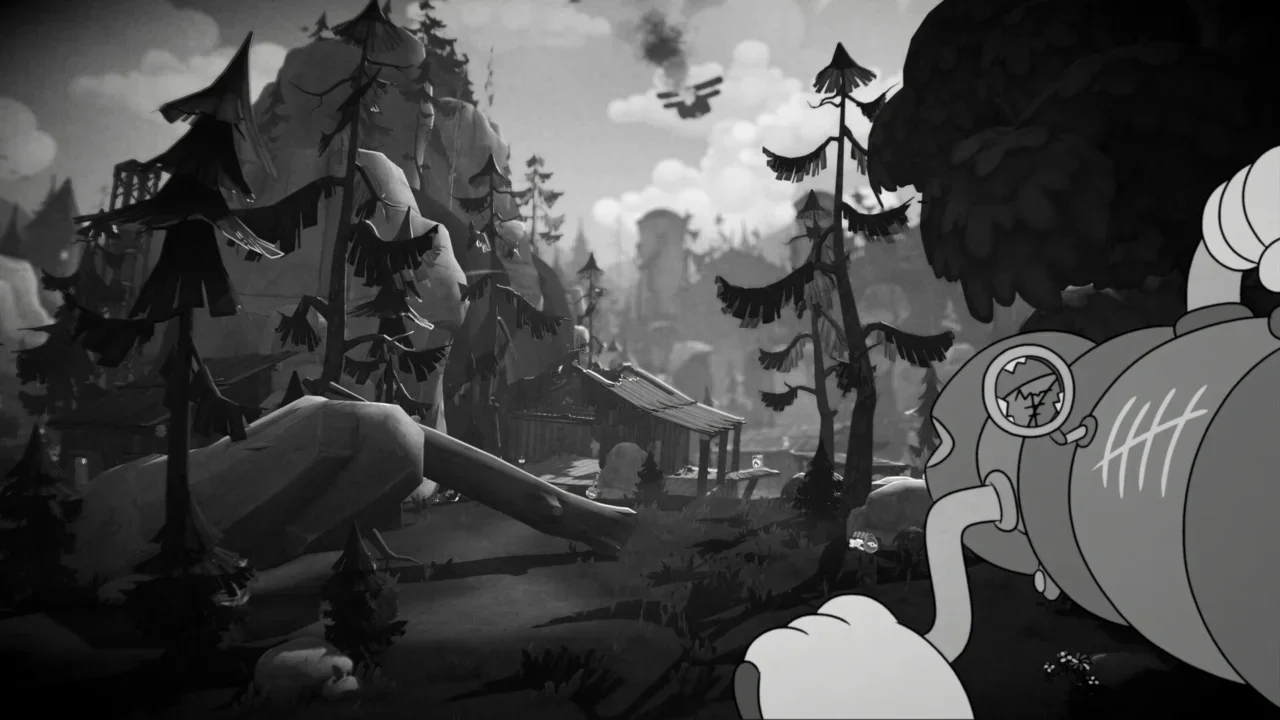
Mouseburg is a miserable, monochromatic labyrinth that absolutely refuses to hand out charity. When you finally take that massive elevator down into The Depths during the "Shrewd Shrews" job, the sheer scale of the underground city is enough to make your head spin. Right out of the gate, the game presents you with a locked door, a panel of levers, and absolutely zero immediate context.
You could theoretically brute force it, assuming you have unlimited free time and a high tolerance for repetitive clicking. I prefer a more surgical approach. I tore this level apart looking for every scrap of paper and tally mark to figure out exactly what this door is hiding. If you are starting to lose track of where this specific case falls in the grand scheme of your investigation, you should definitely consult my Mouse P.I. For Hire How Long to Beat & Full Mission List to get your bearings.
Finding The Locked Door
Before we start punching in numbers, you need to know exactly where the door is located. Navigating The Depths can put you 6 feet under if you wander into the wrong alleyway.
After you ride the massive elevator down to the ground floor, step out and immediately take a hard left. Walk right past the frightened local mouse and the wall tagged with "SPIKE-D IS MICE" graffiti. Keep hugging that left side until you see a small wooden staircase leading up into a dedicated room. Inside, you will find the control panel with four zeros and the levers required to input the codes.
The Core Level Codes
The developers actually hid four specific codes organically throughout the level. Finding them requires an eye for detail and a willingness to crawl into dirty spaces.
Code: 2137
You do not have to walk far for this one. Step out of the code room and look underneath the wooden platform you just walked up. Crouch down into the dirt. You will find two shiny coins and a series of tally marks scratched into the support beams reading 2-1-3-7. Punch that in, and Jack Pepper will spout a line of Polish dialogue that roughly translates to asking why he should choose when he can just take both. Inside the room, you will find a table scattered with 10 coins.
Code: 0451
This is a classic trope for anyone who grew up playing immersive sims. Head back down to the ground floor and wrap around to the other side of the peaceful shrew community. Look for a storefront labeled "Quick Loans Edek Pitos & Co." Walk inside, hop over the banker who is minding his own business, and check the paper in the very back of the shop. It clearly displays 0451. Inputting this code prompts Jack to call it a classic. You walk away with another 10 coins for respecting the classics.
Code: 1234
This code requires some progression. Work your way up to the second floor of The Depths until you spot the "Writers untie!" graffiti next to a drawn flower and an anchor. Look up. You will see a grapple point hanging from some balloons. Swing up to the ledge, and look for a wooden platform with fish graffiti sprayed above it. Instead of walking through the nearby door, crouch under the platform and crawl into the warp pipe. You will get spit out into a tiny, claustrophobic room with a tally mark reading 1-2-3-4. When you enter this at the main door, Jack jokes that it is the same combination as his luggage. Walk into the room to find some spilled drinks and your 10 coin reward.
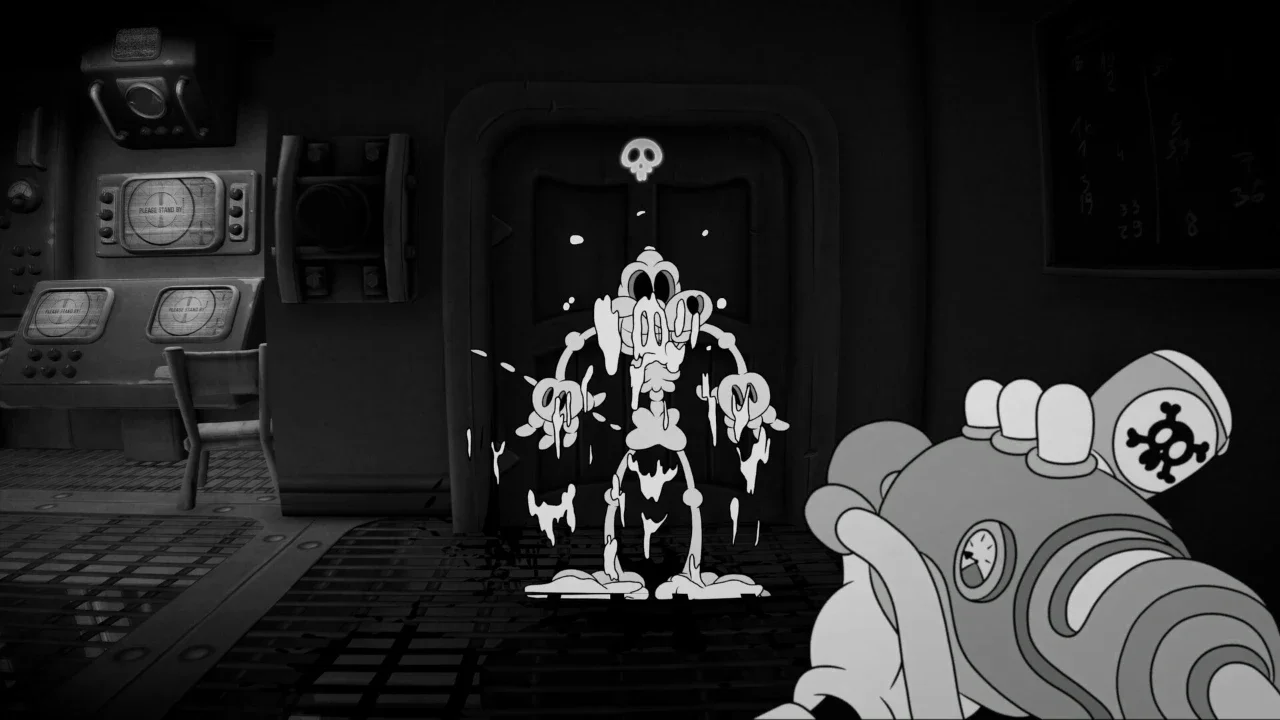
Code: 3125
You will find this code much later in the mission when you are actively chasing the magnet carrying your precious valve. The magnet will eventually drop the valve onto a desk labeled "lost n' found". Stop before you grab your objective. Look at the shelving unit to your right. Tucked on the bottom shelf is a piece of paper reading 3-1-2-5. Entering this code reveals an absolute fever dream. The door opens to show a bizarre, hovering dog creature with glowing glasses, a puritan hat, and rubber hose arms floating over a suitcase. Jack stays completely silent. I do not blame him. Grab your 10 coins and back away slowly.
The Secret Easter Egg Codes
The rabbit hole goes deeper. By digging outside the bounds of the immediate level design, I verified four extra codes that trigger distinct easter eggs.
Code: 1920
Inputting this code acts as a time machine. The door opens to reveal a slightly older, classic version of Jack Pepper's office. There is no money to collect here, just a pure nostalgia trip that pays homage to the early conceptual days of the game.
Code: 2019
Punching in this year reveals a direct nod from the developers. The room contains a computer screen and a blackboard displaying "[Insert Fumi team here]". Right below that is a note reading "Fumi Team xoxo." It is a cheeky little self insert, and more importantly, it grants you another 10 coins.
Code: 0316
This one is for the wrestling fans. The door opens to a massive framed portrait of a bald, bearded man with glasses standing shirtless behind a rock. It is a brilliant, absurd reference to Stone Cold Steve Austin. Claim your 10 coins and leave the rattlesnake alone.
Code: 1224
This code is pure nightmare fuel. The door hisses open with a cloud of thick smoke. Once it clears, you are staring at a blood stained surgical bed, scissors scattered on the floor, an open medical briefcase, and a pair of Groucho Marx glasses resting on a block of cheese. Jack audibly calls it creepy. Take your 10 coins and get out of there.
As a final note, I noticed a very unsettling detail while grinding these out. After inputting several of these codes back to back, a completely solid black mouse statue quietly appeared in the room with me. It does not attack, but it definitely makes you feel like you are being watched.