Screamer Beginners Guide: Things I Wish I Knew Before Hitting the Track
Screamer hides its most brilliant racing mechanics behind brutal difficulty spikes and terrible default settings, but I figured out how to fix them so you do not have to.
I love the chaotic, neon soaked world that Screamer drops you into. The premise of competing in an illegal, planet spanning tournament for a ten billion dollar prize while dodging climate disasters is right up my alley. The actual racing feels incredibly fast, the combat is satisfying, and the anime inspired storyline is genuinely engaging. The problem is that the game does a miserable job of explaining how to actually drive your car.
The developers throw you onto the tarmac with a highly sensitive control scheme, a convoluted resource economy, and a handful of default settings that actively hinder your performance. You will likely breeze through the first few chapters before slamming headfirst into a difficulty wall that makes the AI feel blatantly unfair. I spent hours grinding my teeth, blowing up my own vehicle, and fighting the controls before I finally understood the underlying rhythm of the game. If you are struggling to maintain your grip or figure out why the enemy racers are suddenly moving fifty miles per hour faster than you, here is exactly what you need to change.
The Settings Sabotage
Before you even look at the track, you need to open your options menu and fix a massive developmental oversight. The game enables two specific settings by default that will completely ruin your experience if you leave them on.
Disable Neural Acceleration and Braking
There is a setting called Neural Acceleration and another called Neural Braking. Turn them both off immediately. These "assists" continuously and aggressively reduce your vehicle's speed during corners and in clustered situations. They forcibly brake your car to keep you on the track. The massive problem here is that the enemy AI does not suffer from this penalty.
When you reach Episode 7 in the story, the game stops holding your hand. If you have those neural assists turned on, you will find it mathematically impossible to catch the leaders. Your car will artificially slow down while the AI blasts past you at full speed. I spent a frustrating amount of time stuck in last place during this chapter, completely unaware that the game was holding the brake pedal down for me. The moment I turned those options off, I started placing first again. You have to rely on your own raw driving skill, even if it means bumping into a few walls while you learn.
Wrestling the Control Scheme
Screamer utilizes a highly …unusual… twin stick driving setup. You use the left analog stick to steer the car normally and the right analog stick to initiate drifts. It is a neat concept, but the execution is incredibly twitchy.
The Single Stick Mapping Fix
If you find yourself constantly oversteering and spinning out into the barricades, you are not alone. The right stick drift sensitivity is cranked so high that even a microscopic flick sends your car sliding at a ninety degree angle. Thankfully, you do not have to play this way.
Go into your control settings and assign both Steering and Drifting to the exact same analog stick. This completely transforms how the game feels. The cars become significantly more responsive, and you can actually navigate tight corners by gently feathering a single stick instead of trying to coordinate two separate inputs while traveling at mach speed. If you prefer to keep the twin stick setup for the challenge, remember that smooth inputs are mandatory. Yanking the sticks will just get you killed.
The Shifting and Combat Economy
You cannot just hold the gas pedal down and expect to win in this tournament. You have to manage three separate meters simultaneously, and the game expects you to learn this through trial and error.
Manual Active Shifting is Mandatory
Do not use the automatic transmission. It keeps you in lower gears for way too long and completely deprives you of your most valuable resource. Screamer uses an Active Shift system, which functions exactly like the active reload mechanic from Gears of War. As your RPM climbs, you tap the Left Bumper at the perfect moment to shift gears. Hitting a perfect Active Shift grants you a burst of speed and feeds your Sync meter. It is the core rhythm of the game. You also want to tap that Left Bumper right when the announcer yells "Burn" at the starting line for a Perfect Launch.
Weaponizing Your Meters
Your Sync meter is your lifeblood. You build it by drifting, hitting Active Shifts, and snaking behind opponents. You can spend it in two ways. You can tap the button to deploy a temporary Shield to block incoming attacks, or you can hold the button and release it on a timed prompt for a massive speed boost. If you successfully parry an attack with your Shield, the game refunds the Sync you just spent.
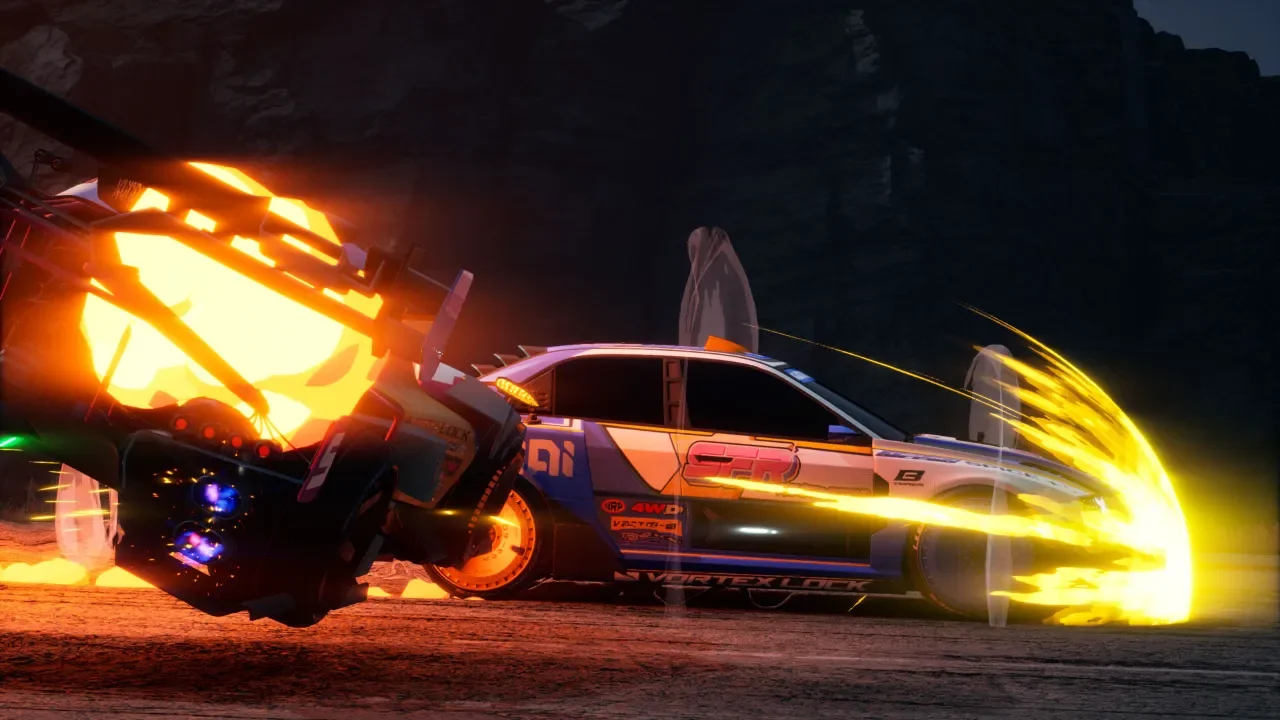
Then you have Entropy, which is purely designed for violence. Entropy costs Sync to activate and turns your vehicle into a flaming battering ram called a Strike. You use this to instantly KO opponents, which is utterly vital during Team Races where your score is determined by how many rivals you destroy.
Surviving the Corners
Understanding how to navigate corners will shave seconds off your lap times, but you have to understand that not all cars are created equal in this roster.
Cold Entrances and Hot Exits
The golden rule of arcade racing applies heavily here. You enter a corner cold and exit it hot. When approaching a hairpin turn, you actually need to use your brakes. Drop your speed, initiate the drift, and aim for the apex of the corner. The moment your nose is pointed toward the exit, you drop the brake, hit an Active Shift, and burn your Sync boost to slingshot onto the straightaway. Wall riding is generally a terrible idea unless you are desperate to maintain a combo, as the speed penalty for scraping the barricades is severe.
Learning Your Vehicle
You are forced to play as different characters throughout the story, and their cars handle wildly differently. Do not expect Hina's car to drive like Gregory's. Hina has a vehicle that loves tight, continuous drifts where you can rattle off multiple gear shifts mid corner. Gregory drives a grippy brick that barely slides at all, forcing you to rely entirely on precision steering rather than drifting. Take a lap to figure out what the car actually wants to do before you commit to a driving style.
If you are trying to figure out the best way to farm specific character abilities after learning their quirks, I wrote a dedicated Screamer trophy and achievement guide that breaks down the fastest tracks for grinding masteries.
Once you disable those neural assists and remap your steering, the game opens up beautifully. The frustrating AI rubberbanding becomes manageable, and the combat loop clicks into place.