Resident Evil Requiem Beginner's Guide: How to Survive the First Night
You are going to die a lot in the opening hours of this game unless you fundamentally change how you approach survival horror.
Capcom has completely rewritten the rulebook with their return to the ashes of Raccoon City. The Care Center is a sprawling labyrinth designed to punish old habits. If you walk into this facility expecting to shoot your way through every single problem, you will be staring at a gruesome game over screen before you even find your first safe room. I spent my first night with the game completely paralyzed by resource anxiety and terrible decision making. I want to save you from that exact frustration.
You are balancing two completely different campaigns under one roof. You have Grace Ashcroft trying to quietly survive a waking nightmare, and you have Leon S. Kennedy treating the undead like a tactical combat simulation. To succeed here, you need to understand the underlying systems running the simulation. You need to know when to fight, when to hide, and when to run.
Tuning The Horror To Your Liking
Before you even pick up a weapon, you need to fix your settings. The game makes a few bold choices out of the gate that might not work for everyone.
You are immediately faced with a choice between Classic and Modern difficulty for your standard playthrough. The game barely explains the long-term ramifications of this choice. I highly recommend swallowing your pride and picking Modern. Classic mode forces you to manage ink ribbons to save your progress at typewriters. This was charming in 1996. In a sprawling modern game with massive environments and unpredictable AI, it is a tedious chore. You do not get a special ranking or bonus weapons for hoarding ink ribbons anymore. You just get the headache of losing forty minutes of progress because a Blister Head ambushed you in a dark hallway.
You also need to address the camera. Grace defaults to a first-person perspective to amplify the claustrophobia. It works incredibly well for horror, but the head bobbing is aggressive. If you are prone to motion sickness, go into your camera settings and tone down the movement immediately. Alternatively, you can force the entire game into a third-person view. I actually prefer keeping Grace in first-person to heighten the tension, but flipping to third-person gives you a massive advantage when trying to peek around corners and avoid patrols.
Two Protagonists With Radically Different Rules
You cannot play Grace the way you play Leon. If you try, the game will crush you. The campaign constantly swaps you between these two characters, forcing you to mentally shift gears on the fly.
The Fragility of Grace Ashcroft
Grace is an analyst, not a super soldier. Her segments are pure, unadulterated survival horror. She starts with virtually nothing and relies entirely on stealth to navigate the Care Center. Your primary goal with Grace is to go unnoticed. She cannot afford to get into drawn-out firefights. Her inventory space is agonizingly limited, meaning every single healing item or box of ammo you pick up is a massive commitment.
When you do inevitably get cornered as Grace, you have to use the environment to survive. Find well-lit rooms. The massive creature known as The Girl stalks Grace endlessly throughout the early chapters. You cannot kill her. You cannot even stagger her effectively. She hates the light, so you need to memorize where the functioning overhead bulbs are and use them as safe havens.
The Aggression of Leon Kennedy
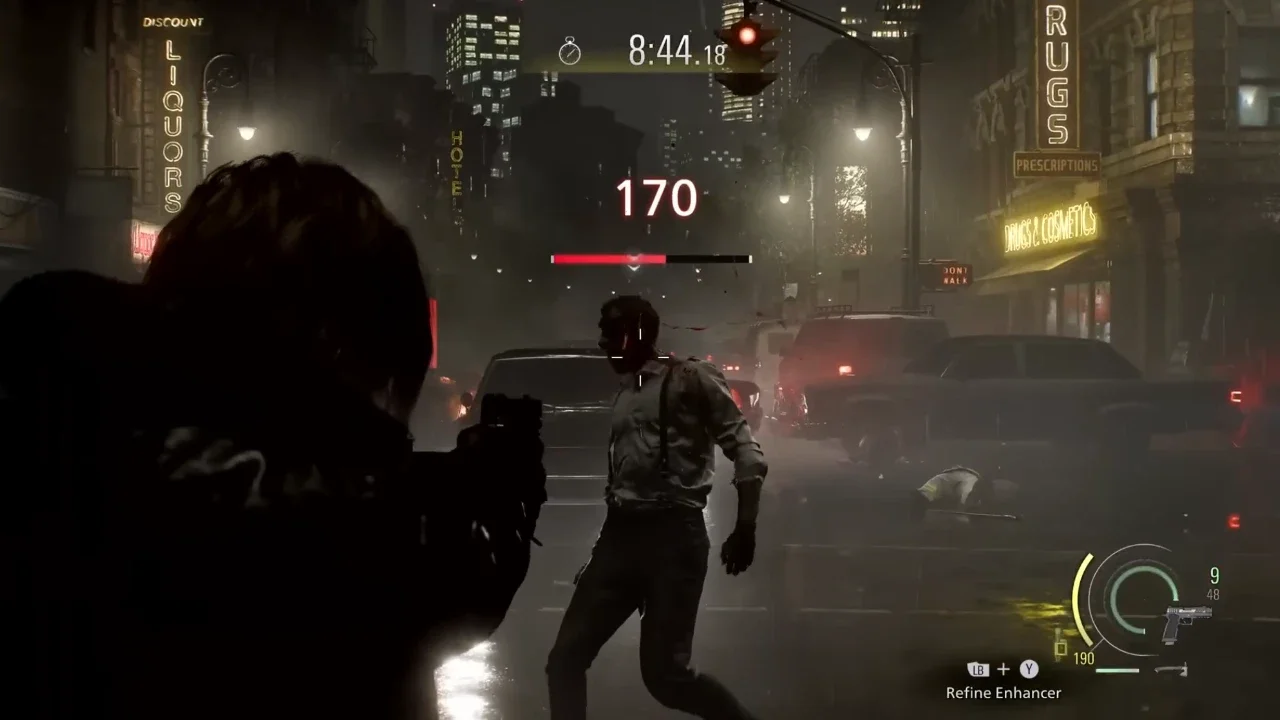
When the perspective shifts to Leon, the game turns into a tactical shooter. Leon is heavily armed and fully capable of clearing rooms. He defaults to a third-person view and possesses a dedicated parry mechanic with his hatchet.
You actually want to engage enemies with Leon to clear safe paths. I highly recommend learning the parry timing early. A successful parry negates all incoming damage and opens the enemy up for a brutal counterattack. For a deep dive into mastering Leon's arsenal, staggering enemies with leg shots, and dealing with late-game mutations, check out my Advanced Combat and Enemy Tactics Guide.
The Art Of Running Away
The infected in this game do not behave like the mindless shamblers from previous titles. The T-Virus variant here leaves a shred of humanity intact.
Many of the enemies you encounter are simply acting out their final moments alive. You will see infected orderlies endlessly mopping the same bloody patch of floor. You will find a cook violently chopping meat in the cafeteria. As long as you do not bump into them or make excessive noise, they will completely ignore you.
Do not waste your precious ammunition executing enemies that are minding their own business. Study their patrol routes. You can distract them easily by throwing an empty bottle across the room or simply turning off a light switch. The enemies hooked up to IV stands are entirely blind but violently sensitive to sound. If you throw a bottle at a regular zombie, the IV infected will sprint over and tear that zombie to pieces for you. Let the monsters kill each other while you slip out the back door.
Strip Mining The Environment
Your map is the single most powerful tool in your inventory. You need to check it obsessively.
Older games in the series would turn a room completely blue on the map once you found every hidden item. That crutch is gone. The map will only mark items, locked drawers, and puzzle pieces if you physically walk close enough to them. This means you must manually scour every single inch of a room. Look for yellow tape or paint. The developers use yellow visual cues to highlight destructible crates and climbable ledges. Shoot the hanging briefcases, smash the wooden boxes, and interact with every single file you find.
When you do pick up a new item, open your inventory and examine it in 3D space. I cannot stress this enough. Look at objects from every conceivable angle. A seemingly useless decorative box might have a tiny hidden latch on the bottom. A document might have a safe code scribbled on the back.
You also need to get comfortable with backtracking. As you unlock new keycards and wristbands, you must return to previous areas to open secure cargo containers. This is where you find your weapon attachments, rare metals, and permanent health upgrades. Do not leave a wing of the hospital until you have drained it of every useful resource.
Speaking of resources, dealing with the crafting economy is a completely separate nightmare. Grace has to harvest infected blood and analyze it through laser microscopes, while Leon relies on traditional gunpowder mixing. If you want the complete breakdown on how to upgrade your Blood Collector and memorize every single recipe, read my Complete Crafting and Resource Masterclass.
Get your settings right, respect the shadows, and stop treating every zombie like a mandatory boss fight. Do those three things, and you might actually survive the night.