Monster Hunter Stories 3 Calamitous Elder Dragon Guide: How to Find and Kill Them All
You finally reached the endgame, your roster is stacked, and you think you are untouchable. Then a Calamitous Elder Dragon spawns, completely ignores your defense stats, and wipes your entire party in three turns.
The game does not prepare you for these fights. Regular story bosses follow predictable rules, but the Calamitous variants manipulate the battlefield, spam unique status ailments, and require complete mastery of your combat mechanics to survive. Brute force is useless here. If you walk into these encounters without the correct elemental resistances and a perfectly tuned strategy, you are just volunteering for a Game Over screen.
Do not worry about looking cool in your layered armor right now. You need raw, unadulterated survival gear. I am going to walk you through exactly how to force these elusive nightmares to spawn and give you the tactical blueprints to dismantle every single one of them.
How to Force Elder Dragon Spawns
You will never find a Calamitous Elder Dragon casually strolling around during the day. They are exclusive to the night cycle.
If you want to hunt one, go to any Catavan Stand and advance the time to night. From there, you need to pick fights and win them. Running over monsters in the overworld does not count. You must initiate a dedicated battle screen. Thankfully, you do not have to slog through ten-minute fights to trigger the spawn. Go to an early zone and just spam the Quick Finish option on low-level trash mobs.
After a random number of successful night battles, a cutscene will trigger showing the Elder Dragon descending upon a specific region. You have zero control over which region they pick. If you are farming in Azuria, the dragon might still spawn in Serathis. Once the cutscene plays, do not change the time of day. You can fast travel to the target region safely, but the moment you switch the clock back to daylight, the dragon vanishes.
The War of Attrition: Repel vs. Slay
These fights are marathons. The game knows that dropping a full health Elder Dragon on you might be statistically impossible depending on your current level.
During your first few attempts, you do not actually have to kill the dragon in a single run. Once you deplete roughly a third of their health bar, you will trigger a repel state. The battle ends, a cutscene plays, and you get to walk away with your dignity intact. The best part is that the game remembers the damage you dealt. When you spawn that specific dragon again, it will start the fight with whatever health it had remaining during your last encounter.
Once you finally empty the health bar completely, you slay the beast. Doing this from full health provides massive upgrades to your Battle Ally skills and completely revitalizes the local Habitat Restoration pool. Beating them is also the only way to unlock their eggs in local dens.
Namielle: The Abyssal Terror of Azuria
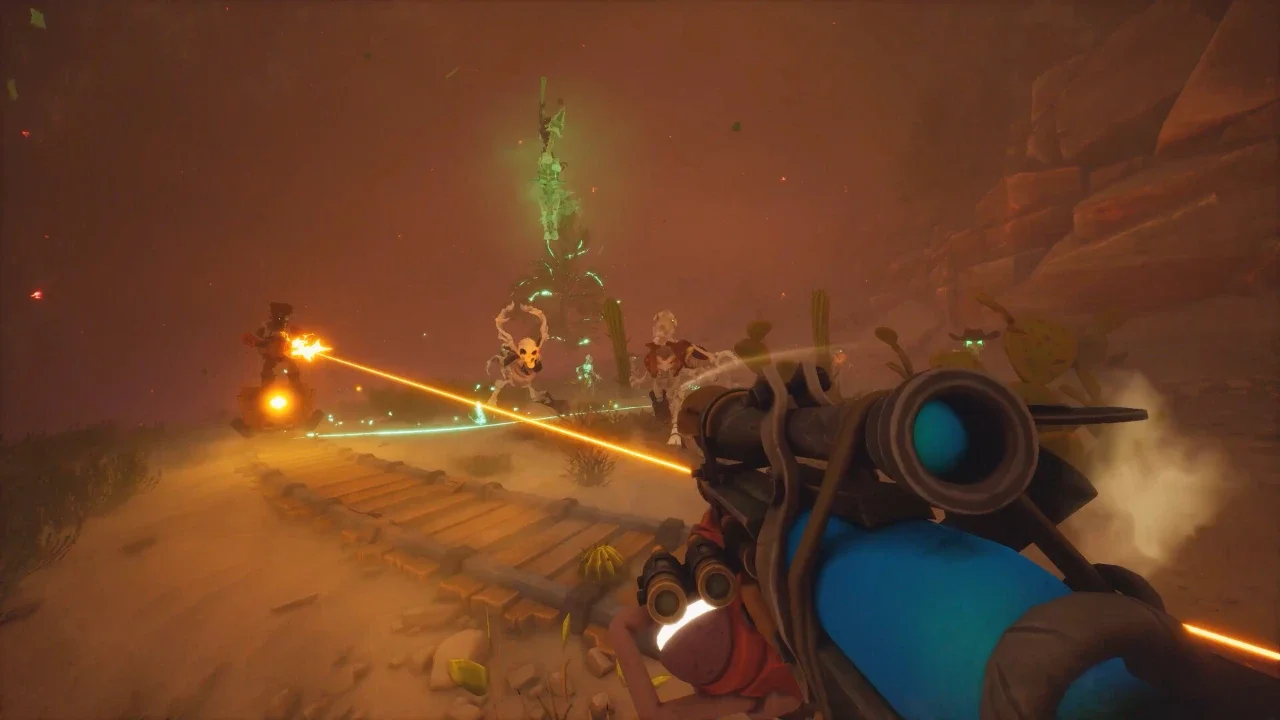
Namielle is waiting for you hovering over Mirror Lake in Azuria. This dragon is a nightmare if you rely heavily on stamina-draining skills. It utilizes both Water and Thunder attacks, and its unique strikes can outright halt your stamina regeneration.
If you are wearing armor sets weak to water or thunder, you are going to get washed. You need a dedicated Fire element team here. Bring Ratha along, as he pumps out massive fire damage without carrying the standard water weakness most fire types suffer from. Eleanor is your best companion choice because she brings heavy fire artillery and passive defensive buffs.
Ibushi and Narwa: The Duo of Despair
Located at the peak of Mt. Canalta, this is the hardest fight in the entire game. You are not fighting one Elder Dragon. You are fighting two of them simultaneously.
Ibushi throws devastating Dragon attacks while Narwa spams Thunder from across the arena. The defining mechanic here is Mind Connection. While they have separate health pools, depleting the Wyvernsoul Gauge of one will stagger both dragons. You absolutely must focus all your damage on a single target. Do not split your team's attention.
One dragon will always have their elemental mantle active while the other sits in a linked state. The mantled dragon hits significantly harder. Focus your attacks on breaking the active mantle to mitigate the incoming damage. Malzeno is an absolute godsend for this encounter because it dishes out heavy Dragon damage to crack their shells while providing passive healing to keep your team alive.
Yama Tsukami: The Floating Mountain
You can find Yama Tsukami floating above the Bountiful Dunes in Tarkuan. Compared to the twin serpents, this fight is a much slower battle of attrition.
Yama Tsukami uses pure Non-Elemental attacks. Your primary goal is to carve through its massive health pool by targeting the tentacles. Destroying the tentacles forces the dragon to expose its mouth. Once the mouth is open, you need to break it immediately to trigger a massive topple state.
Balance your Wyvernsoul Gauge carefully here. You want to save your heavy hits to break the mouth, trigger a Synchro Rush, and then immediately deplete the gauge for a second Synchro Rush. If you consult your monster weaknesses cheat sheet, you will see that Ice and Dragon are the only elements that leave a scratch. Pull your best monsties out of the stable like Deviljho or Arkveld and let them go to work.
Velkhana: The Frozen Executioner
Velkhana is perched on a spire near the Glacial Caps in Serathis. If you enter this fight without maxed out Ice resistance, you are going to have a very short, very cold expedition.
Velkhana introduces a unique status ailment called Frostblight. If you get hit by Icicle Raid or Hyperfreeze and catch Frostblight, your character will be forcibly toppled after a few turns. You can cure this by chugging a Nulberry Elixir or by riding your Monstie, since mounting grants complete immunity to status ailments.
Do not rely on breaking parts to interrupt this dragon because Velkhana is incredibly fast. It will almost always attack before your party can react. When Velkhana enters the Freezing Fog Mantle phase, the threat level peaks. It gains access to a move called Absolute Zero, which hits the entire field for fatal damage and applies Skillseal. If you do not have a Head-to-Head lined up to counter it, you must use a Kinship Skill to cancel the attack entirely. If you fail to interrupt Absolute Zero, you are going back to the title screen.
The Calamitous Elder Dragons are the ultimate skill check. If you have been ignoring your weapon types, skipping your defense buffs, or neglecting your EXP grinding, these bosses will expose you instantly. Stop taking shortcuts, memorize the attack phases, and drop them out of the sky.