Slay the Spire 2 Ancients Guide: Surviving the Gods of the Spire

The comforting glow of a boss chest has been entirely replaced by enigmatic deities who want to gamble with your soul.

A gameplay screenshot from Slay the Spire 2 showing the starting encounter with Neow, the Mother of Resurrection, offering the player three beginning bonuses: Precise Scissors, Arcane Scroll, and Silver Crucible.

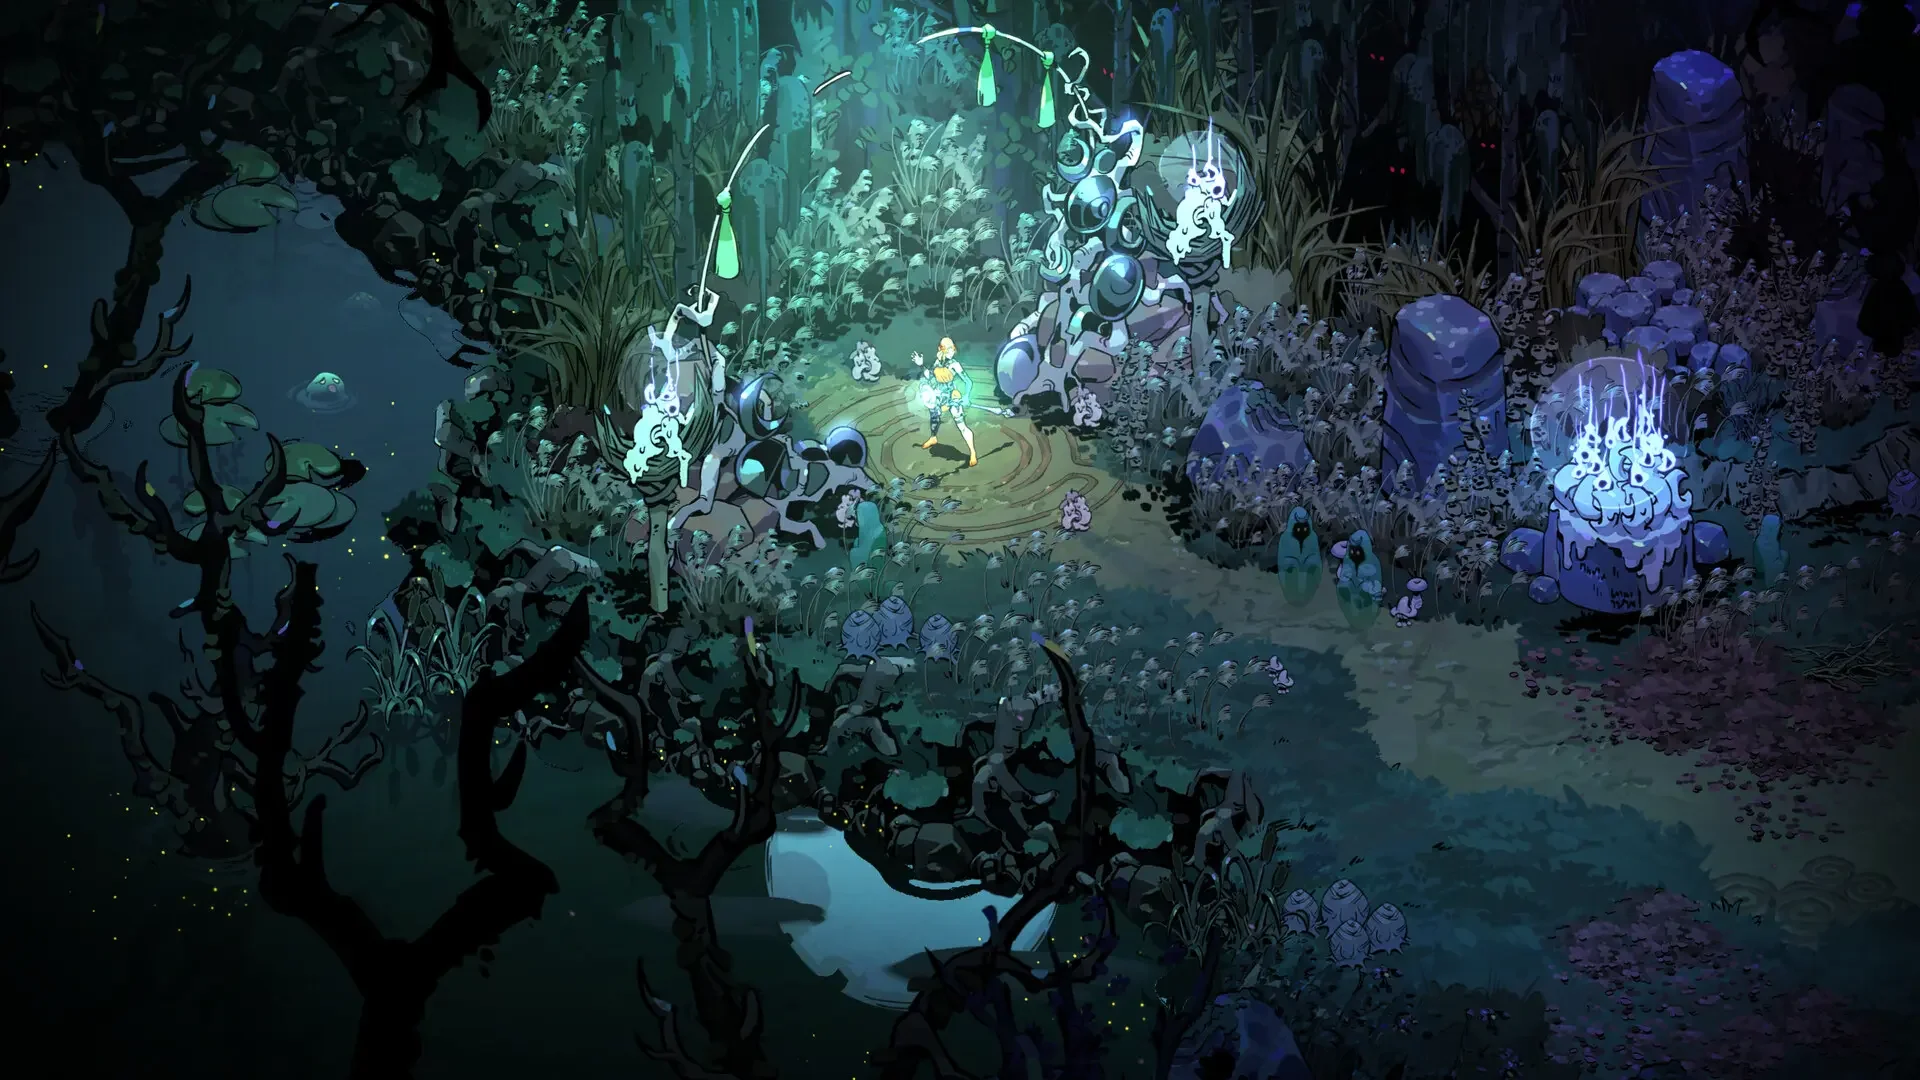
Beating an Act boss in Slay the Spire 2 no longer feels like a clean victory. The traditional boss relic system is dead and buried. Instead, Mega Crit introduces you to the Ancients. You meet them at the very beginning of every Act, and they act as twisted merchants offering you run-defining power spikes. The catch is that half of these "blessings" are packaged with horrifying downsides.

If you are struggling to even survive the hallway fights leading up to these encounters, you might want to recalibrate your baseline strategy with my Slay the Spire 2 survival guide. For those of you actually climbing the tower, navigating these specific Ancient encounters is the new make or break mechanic of the entire game. I have lost count of how many times I tanked a perfectly good deck by picking a cursed relic I did not fully understand. To save you from that exact misery, here is the complete breakdown of every Ancient and every single item they try to pawn off on you.

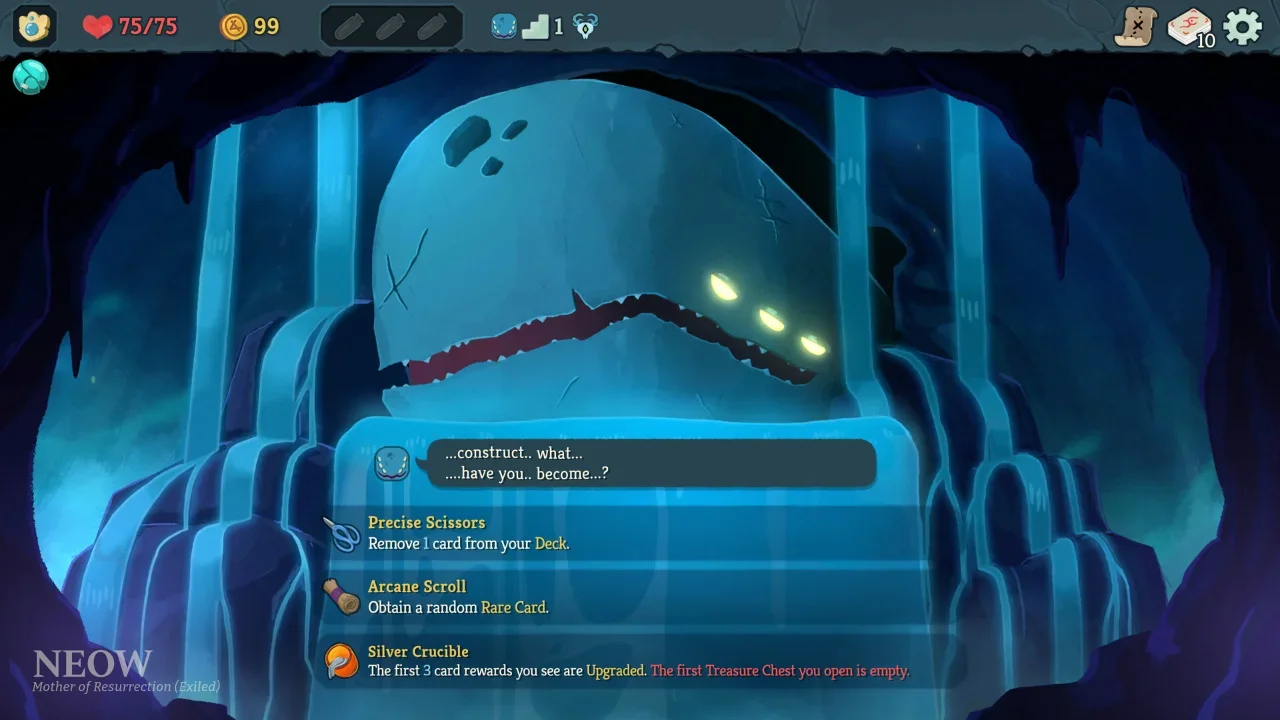
Act 1: Neow, Mother of Resurrection

The giant whale is back, and she is the only Ancient you meet at the start of Act 1. Her pool is massive, designed to kickstart your deck before the real suffering begins. I highly value consistency here. Removing bad cards is almost always better than gambling on a random rare.

Neow's Relic Pool

The foundational items that dictate your entire Act 1 strategy.

Relic Name Effect & My Take
Arcane Scroll Obtain a random Rare Card to add to your deck. A pure gamble that can either secure an early win condition or hand you unplayable dead weight.
Booming Conch Draw 2 extra cards at the start of Elite combats. Incredible for securing turn one setups when Elites hit their hardest.
Cursed Pearl Gain the Greed curse card and 333 Gold. A massive cash injection, but having an unplayable Ethereal card clutters your hand early on.
Golden Pearl Gain 150 Gold. A safe, boring choice that guarantees an early shop purchase.
Large Capsule Gain 2 random relics, plus an extra Strike and Defend. The relics are tempting, but adding basic cards actively ruins deck consistency.
Lava Rock The Act 1 Boss drops 2 Relics. A delayed gratification pick that rewards you heavily if you survive the first major hurdle.
Lead Paperweight Choose 1 of 2 Colorless cards for your deck. Usually a reliable way to get cheap utility early on.
Leafy Poultice Transform 1 Strike and 1 Defend, but lose 10 Max HP. Bleeding out that much health on a fragile character is a fantastic way to die in Act 1.
Lost Coffer Gain 1 card reward and 1 random potion. Very underwhelming compared to permanent upgrades.
Massive Scroll Choose 1 of 3 Multiplayer cards. Only relevant if you are actually running a co-op lobby.
Neow's Torment Add Neow's Fury to your deck. It deals 10 damage and recycles your discard pile. Fantastic early burst damage.
New Leaf Transform 1 card. A minor tweak that usually gets rid of a basic Strike for something marginally better.
Nutritious Oyster Raise your Max HP by 11. Boring but incredibly effective for surviving bad RNG.
Pomander Upgrade a card. Always useful, especially for unlocking the true potential of your character's unique starting mechanic.
Precarious Shears Remove 2 cards from your deck and take 13 damage. I take this constantly. Trading health for a thinner deck pays off immensely.
Precise Scissors Remove 1 card from your deck. The safest, most reliable way to improve your opening draws without any penalty.
Scroll Boxes Lose all Gold, then choose 1 of 2 card packs. Since you start with very little gold, this is practically free drafting power.
Silver Crucible First 3 card rewards are upgraded, but your first chest is empty. A fair trade if you desperately need to secure early combat dominance.
Small Capsule Obtain a random relic. Always a solid blind pick.
Stone Humidifier Gain 5 Max HP whenever you rest at a Rest Site. Rewards a cautious playstyle, though you should ideally be Smithing instead of Resting.

Act 2: The Crossroads of Weirdness

When you transition into Act 2, the difficulty scaling gets completely unhinged. If you want to understand the exact math behind the enemy power spikes in this zone, check my epochs timeline breakdown. You will meet one of three specific Ancients here, and they demand very different drafting philosophies.

Orobas, Living Rainbow

Orobas is a cheerful space wyrm obsessed with breaking the standard class rules. His entire loot pool revolves around colorless cards, cross-class synergy, and massive visual flair.

Orobas Relic Pool

The patron saint of chaotic deckbuilding and rule breaking.

Relic Name Effect & My Take
Alchemical Coffer Gain 4 potion slots filled with random potions. Fantastic for an immediate burst of survival utility.
Archaic Tooth Transform a starter card into an ancient version. A decent power bump for your baseline deck.
Driftwood You can reroll each card reward once. Easily one of his best offerings, giving you insane drafting consistency for the rest of the run.
Electric Shrymp Enchant a Skill with Imbue so it automatically plays at combat start. Absurdly broken if applied to a heavy defensive power or scaling skill.
Glass Eye Obtain 2 Common, 2 Uncommon, and 1 Rare card. Hand bloat is a real risk here, but it is a massive raw resource injection.
Prismatic Gem Gain 1 Energy per turn, but card rewards now feature other characters' cards. Complete chaos. Fun, but practically impossible to strategize around.
Radiant Pearl Add 1 Luminesce to your hand at combat start (Retain, Gain 2 Energy, Exhaust). A brilliant setup tool for explosive opening turns.
Sand Castle Upgrade 6 random cards. Saves you massive amounts of time at Rest Sites.
Sea Glass See 15 cards from another character and add any number. A highly selective version of Prismatic Gem that is actually viable for combo hunting.
Touch of Orobas Transform your starter relic into an ancient version. Highly dependent on which character you are playing, but generally a solid upgrade.

Pael, Melting Dragon

Pael is a slow, melancholic dragon offering mechanics heavily focused on patience and sequencing. If you play highly aggressive, spam-heavy decks, Pael will feel incredibly clunky. If you understand how to stall a fight and set up massive combos, he is your best friend.

Pael's Relic Pool

The dragon who rewards delaying gratification.

Relic Name Effect & My Take
Pael's Blood Draw 1 extra card at the start of your turn. Pure, unconditional consistency. Always a top tier choice.
Pael's Claw Defends gain 1 Block but Exhaust when used. Incredible for deliberately thinning your deck during long boss fights.
Pael's Eye End your turn without playing cards to Exhaust your hand and take an extra turn. Extremely niche, mostly used for ditching a terrible draw to fish for a win condition.
Pael's Flesh Gain 1 extra Energy from turn 3 onward. A fantastic engine piece if you have the defensive tools to survive the early rounds.
Pael's Growth Clone a card. Simple and effective for doubling up on a heavy hitter.
Pael's Horn Add 2 Relax cards to your deck (Gain 15 Block, next turn gain 2 Energy and draw 2). The definition of Pael's playstyle. Turtle up now to explode later.
Pael's Legion Doubles Block gained from a card, then goes on cooldown for 2 turns. Pairs beautifully with high cost, massive shield cards.
Pael's Tears End turn with unspent Energy to gain 2 Energy next turn. Dominant in zero cost or defensive heavy builds.
Pael's Tooth Remove 5 cards. Return 1 upgraded after each combat. A slow burn deck thinning tool that forces you to survive a few awkward fights early on.
Pael's Wings Sacrifice card rewards to Pael. Get a relic every 2 sacrifices. A phenomenal way to turn unwanted garbage into passive scaling.

Tezcatara, It Which Feeds the Fire

Tezcatara is the definition of a deal with the devil. Her offerings are intensely powerful in the short term but often come with an expiration date or a nasty side effect.

Tezcatara's Relic Pool

The witch who trades temporary power for permanent consequences.

Relic Name Effect & My Take
Biiig Hug Remove 4 cards. Shuffling your Draw Pile adds a Soot (Unplayable) to it. Incredible deck thinning, but punishes decks that cycle fast.
Golden Compass Converts Act 2 into a special one-track map. Removes all routing strategy. I avoid this unless I am completely desperate.
Nutritious Soup Enchant all Strikes with Ember (Costs 0, becomes Eternal). Turns your worst cards into free chip damage, but you can never remove them.
Pumpkin Candle Gain Energy every turn. Disappears in Act 3. A pure crutch to get you through the brutal Act 2 Elites.
Seal of Gold Spend 5 Gold at the start of your turn for 1 Energy. Drains your wallet incredibly fast. Terrible if you rely on shops.
Storybook Add Brightest Flame (Gain 2 Energy, Draw 2, Lose 1 Max HP). A massive tempo swing that literally bleeds you to death over time.
Toasty Mittens Exhaust top deck card to gain 1 Strength each turn. Great for Ironclad scaling, but you risk burning your win condition.
Toy Box Gain 4 Wax Relics. The defining Tezcatara choice. Massive immediate power that melts away after a few combats.
Very Hot Cocoa Start combat with 4 extra Energy. Ensures you can play literally your entire opening hand to establish board dominance.
Yummy Cookie Upgrade 4 cards. A safe, high-value pick if you do not want to deal with her cursed gimmicks.

Act 3: Extreme Power and Extreme Danger

Act 3 is where the training wheels come off entirely. You can encounter four different Ancients here, and their mechanics are utterly game breaking. If you are trying to complete character unlocks detailed in my character unlock tier list, these items are usually what carry you over the finish line.

Darv, the Hoarder

Darv is essentially the legacy boss relic pool from the first game. He offers foundational, run altering mechanics without any convoluted trickery.

Darv's Relic Pool

The traditionalist offering massive energy buffs and terrifying curses.

Relic Name Effect & My Take
Astrolabe Transform 3 cards and upgrade them. Excellent for salvaging a mediocre draft late in the game.
Black Star Elites drop an extra relic. Only take this if you are confident you can farm Act 3 Elites without dying.
Calling Bell Obtain a unique Curse and 3 relics. The classic greed pick. Usually worth the dead draw.
Dusty Tome Obtain an Ancient card. Highly variable, but generally a massive power spike.
Ectoplasm Gain 1 Energy per turn, but you can no longer gain Gold. A brutal tradeoff if your deck still needs tuning at shops.
Empty Cage Remove 2 cards. The safe, boring, and highly optimal choice for infinite combos.
Pandora's Box Transform all Strikes and Defends. The ultimate RNG test. It can either forge a god-tier deck or completely break your defensive capability.
Philosopher's Stone Gain 1 Energy, but all enemies gain 1 Strength. In Act 3, giving multi-hitting enemies extra strength is a terrifying prospect.
Runic Pyramid No longer discard your hand. Arguably the strongest item in the game for combo setups.
Snecko Eye Draw 2 extra cards, but start Confused (randomized costs). Take this only if your deck is heavily stacked with expensive cards.
Sozu Gain 1 Energy, but you can no longer gain potions. A painful restriction, as potions are your main emergency button.
Velvet Choker Gain 1 Energy, but cannot play more than 6 cards per turn. Fatal for Silent Shiv builds, perfect for Regent heavy hitters.

Nonupeipe, Serendipity Incarnate

Nonupeipe offers bizarre extremes that can completely flip your approach to the final Act.

Nonupeipe's Relic Pool

The princess of absurd economic and mechanical extremes.

Relic Name Effect & My Take
Beautiful Bracelet Enchant 3 cards with Swift 3 (Draw 3). An absolute powerhouse for cycling through your deck rapidly.
Blessed Antler Gain 1 Energy per turn, but shuffle 3 Dazed into your Draw Pile. The Dazed cards will clog your early turns severely.
Brilliant Scarf The 5th card you play each turn is free. Extremely strong if you can reliably chain low-cost cards into a heavy finisher.
Delicate Frond Fill empty potion slots at combat start. Gives you unparalleled tactical flexibility in every single room.
Diamond Diadem Take half damage if you play 2 or fewer cards. Turns heavy, slow archetypes into immortal tanks.
Fur Coat Mark 7 random combats where enemies have 1 HP. A hilarious mechanic that trivializes a massive chunk of the Act.
Glitter Card rewards have Replay once per combat. Great for double-dipping on specific high-value skills.
Jewelry Box Add Apotheosis (Upgrades all cards for the combat). Arguably the single best card to add to any deck.
Looming Fruit Add 31 Max HP. A massive buffer against the brutal Act 3 bosses.
Signet Ring Gain 999 Gold. You literally buy out the entire shop for the rest of the game.

Tanx, Khimera King

Tanx is purely aggressive. If your deck relies entirely on setting up Frost Orbs or blocking patiently, you need to look elsewhere.

Tanx's Relic Pool

The aggressive beast who only respects raw damage.

Relic Name Effect & My Take
Claws Transform up to 6 cards into Maul. Incredible for generating immediate, scaling attack power.
Crossbow Add a random 0-cost Attack to your hand each turn. Free damage is never a bad thing, especially with strength scaling.
Iron Club Draw 1 card every 4 cards played. The undisputed best relic here for spam-heavy archetypes like Shivs.
Meat Cleaver Cook at Rest Sites (Remove 2 cards, gain 9 Max HP). Double deck thinning and health scaling is absurdly efficient.
Sai Gain 7 Block at turn start. A reliable, passive defensive layer that frees up energy for attacks.
Spiked Gauntlets Gain 1 Energy per turn, but Powers cost 1 more. Brutal if you rely on Echo Form or Demon Form to win.
Tanx's Whistle Add Whistle (Deal 33 damage, stun, Exhaust). A fantastic emergency nuke for elite fights.
Throwing Axe First card played each combat is played twice. Utterly broken if you open with a massive scaling power.
Tri-Boomerang Enchant 3 Attacks with Instinct (reduces cost by 1). Great for cheating out heavy strikes.
War Hammer Upgrade 4 cards when killing an elite. Turns Elite hunting into an unstoppable snowball of power.

Vakuu, the First Demon

Vakuu is a menace. I have actively lost runs to his specific brand of mechanics. Treat his options with extreme paranoia.

Vakuu's Relic Pool

The demon who actively tries to ruin your deck synergies.

Relic Name Effect & My Take
Blood-Soaked Rose Gain 1 Energy per turn, add Enthralled (Must be played first, costs 2). A taxing energy trade-off that ruins opening sequencing.
Choices Paradox Add 1 of 5 random cards to your hand with Retain. Clutters your hand with garbage that breaks tight synergy loops.
Distinguished Cape Lose 9 Max HP, add 3 Apparitions. Intangible is incredible, but lowering your health ceiling in Act 3 is a dangerous game.
Fiddle Draw 2 extra cards per turn, but you cannot draw cards during your turn. Bricks cycle-heavy decks instantly. Avoid.
Jeweled Mask Start combat with a random free Power from your deck. Fantastic if you only run high-impact, expensive Powers.
Lord's Parasol Instantly obtain everything the Merchant sells upon meeting him. Easily his best and safest relic.
Music Box Create an Ethereal copy of the first Attack played each turn. Scales your damage output beautifully.
Preserved Fog Remove 5 cards, add 1 Folly (Unplayable, Innate). Incredible deck thinning, but opening every combat with a dead card hurts.
Sere Talon Add 2 Curses and 3 Wishes. The wishes let you pull specific cards, but the permanent curses are rarely worth the headache.
Whispering Earring Gain 1 Energy per turn, but Vakuu plays your first turn. Letting the AI pilot your crucial setup turn is genuinely terrifying.

The Ancients force you to make hard, permanent choices about the identity of your deck. Do not just grab the shiny item with the word "Energy" attached to it. Read the fine print, check your deck composition, and accept that sometimes the smartest play is picking the option that hurts you the least.

Previous
Previous

Toxic Commando Trophy & aCHIEVEMENT Guide: How to Get 100% Completion

Next
Next

Heart Of The Machine Achievement Guide: Chasing Perfection In A Dying City