Mina the Hollower Guide: Best Sidearms And How To Dual Wield
Sub-weapons are the only thing standing between you and an early grave on Tenebrous Isle.
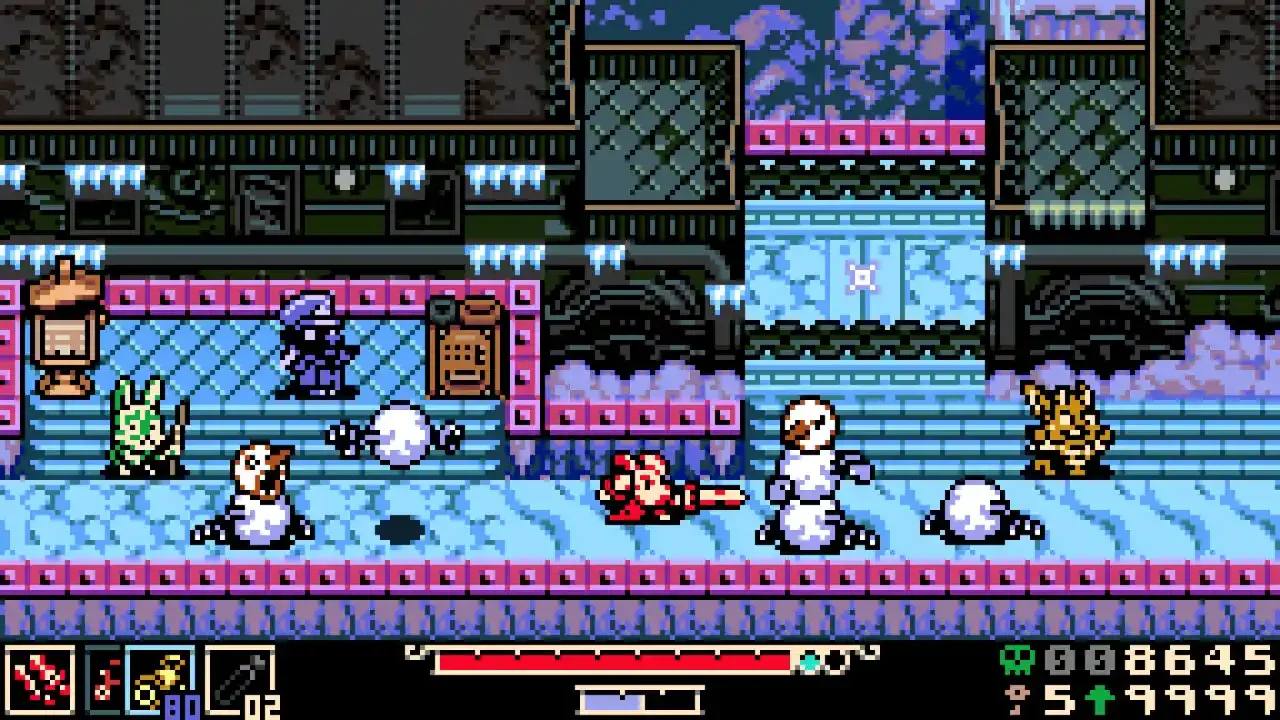
Relying entirely on your primary attack is a fantastic way to get yourself sent back to the main menu. Mina has access to 15 different Sidearms scattered across the map, and they are incredibly vital for both combat and traversal. You need them to cross massive gaps, block projectiles, and melt bosses from a distance.
The problem is that you lose them when you die, and you can only hold one at a time when you start your journey. Before you start tweaking settings with my Mina the Hollower difficulty modifiers guide out of sheer frustration, you need to upgrade your loadout.
How To Get The Dual Sidearm Permit
Running around with a single Sidearm is a massive handicap. You eventually need to carry a combat sub-weapon and a traversal sub-weapon simultaneously.
To unlock this ability, you have to track down a rather shady merchant named Brandish. Once you finish the prologue and Ossex returns to relative normal, head west from the City Center into the Bowery. Walk north past the Music Hall until you spot a guy standing by a large carriage near a pipe. That is Brandish.
He teases you with a Dual Sidearm Permit, but he refuses to sell it until you prove you can handle it. You have to "Bone Up" your stats at a checkpoint and raise your specific Sidearm level to at least five. Your other stats do not matter for this interaction. Once you hit level five, Brandish introduces you to his associate Holden. Holden actually holds the permit and charges you a flat 2,000 Bones for it.
Once you buy the permit, your HUD expands to show two slots. You simply tap your shoulder button (or E on a keyboard) to swap between them on the fly.
Sidearm Upgrades And Joule Boxes
Once you start dual wielding, you are going to burn through your Joules (ammo) incredibly fast.
You need to buy some permanent upgrades from Drillhardt. You can find him in the Follower HQ after you rescue Rhene (if you have not done that yet, check out my Mina the Hollower map and Underlab upgrades guide for a full walkthrough). Drillhardt sells the Joule Alembic for 1,000 Bones, which replenishes your ammo automatically inside your Underlab. More importantly, he sells the Sidearm Recoverer for 2,000 Bones. This is mandatory, as it lets you keep your equipped Sidearms even after you die.
To actually increase your maximum ammo capacity, you have to hunt down Joule Boxes hidden across the world. I strongly recommend grabbing these before you tackle the harder dungeons.
The Best Sidearms To Carry
With 15 total options, your inventory can get cluttered with garbage very quickly. Some sub-weapons are incredibly situational, while others are flat out mandatory if you want to survive. If your primary attacks are feeling weak, pair these choices with the upgrades found in my Mina the Hollower weapons guide.
Here are the absolute best Sidearms you should prioritize keeping in your active slots.
Mist Jar
If you are struggling to stay alive, the Mist Jar is arguably the best item in the game. Using it makes you flash green and dash forward in a straight line. The movement is great for crossing gaps, but the combat utility is what makes it broken.
If you dash straight through an enemy, you take zero damage. Even better, phasing through them gives you a small health bump and builds up your Plasma meter. It is your only consistent way to heal outside of Plasma Vials.
Beckoning Collar
Flying enemies are a massive headache on Tenebrous Isle. The Beckoning Collar summons a tiny imp familiar on a chain that floats around you. It automatically intercepts incoming projectiles and lunges at anything that gets too close.
It slowly drains your Joules while active, but you can press the button again to detonate the imp in a massive explosion. It is perfect for dealing passive damage to bosses while you focus on dodging.
Drill Driver
This is your premier traversal tool. Using it launches you forward like a missile. You absolutely need this to cross massive gaps later in the game (and relying on the Mina the Hollower fast travel network won't save you from platforming puzzles).
In combat, its damage is low, but the knockback is astronomical. You can use it to forcefully shove heavy enemies straight into bottomless pits for instant kills.
Recall Disc
This acts as a brilliant emergency escape button. Your first cast drops a portal right on the ground. Your second cast instantly teleports you back to that portal, followed by a massive explosion. You are fully invulnerable for a split second after emerging. You can bait a boss into a corner, teleport across the room, and let the explosion chip away at their health bar safely.
Deflector Parasol
If you want pure defense, the Parasol is fantastic. Tapping the button throws it out to deal contact damage, block projectiles, and reflect physical hits. If you hold the button, Mina holds it over her head. Jumping while holding it lets you float slowly across long distances. It is basically a shield and a glider wrapped into one item.
Fishing Rod
You can borrow this from an alligator in the Bayou (and keep it forever after he meets a tragic end). Having it equipped makes shadows appear in almost every body of water. Fishing pulls up random junk, but it also gives you Joule Jars and Plasma Roses to refill your meters in an emergency.
You can also use it as a makeshift grappling hook by hooking onto an enemy to yank yourself across gaps. If you want to know exactly where to cast your line, read my Mina the Hollower fishing guide to track down the rarest catches.
Iron Steed
Yes, Mina can ride a bicycle. It is incredibly fast, and you can jump while riding to clear long distances. If you hit an enemy, you deal damage but get knocked off. The real trick is using the bell. Ringing the bell aggros every enemy nearby, letting you group them up before you zoom right past them.